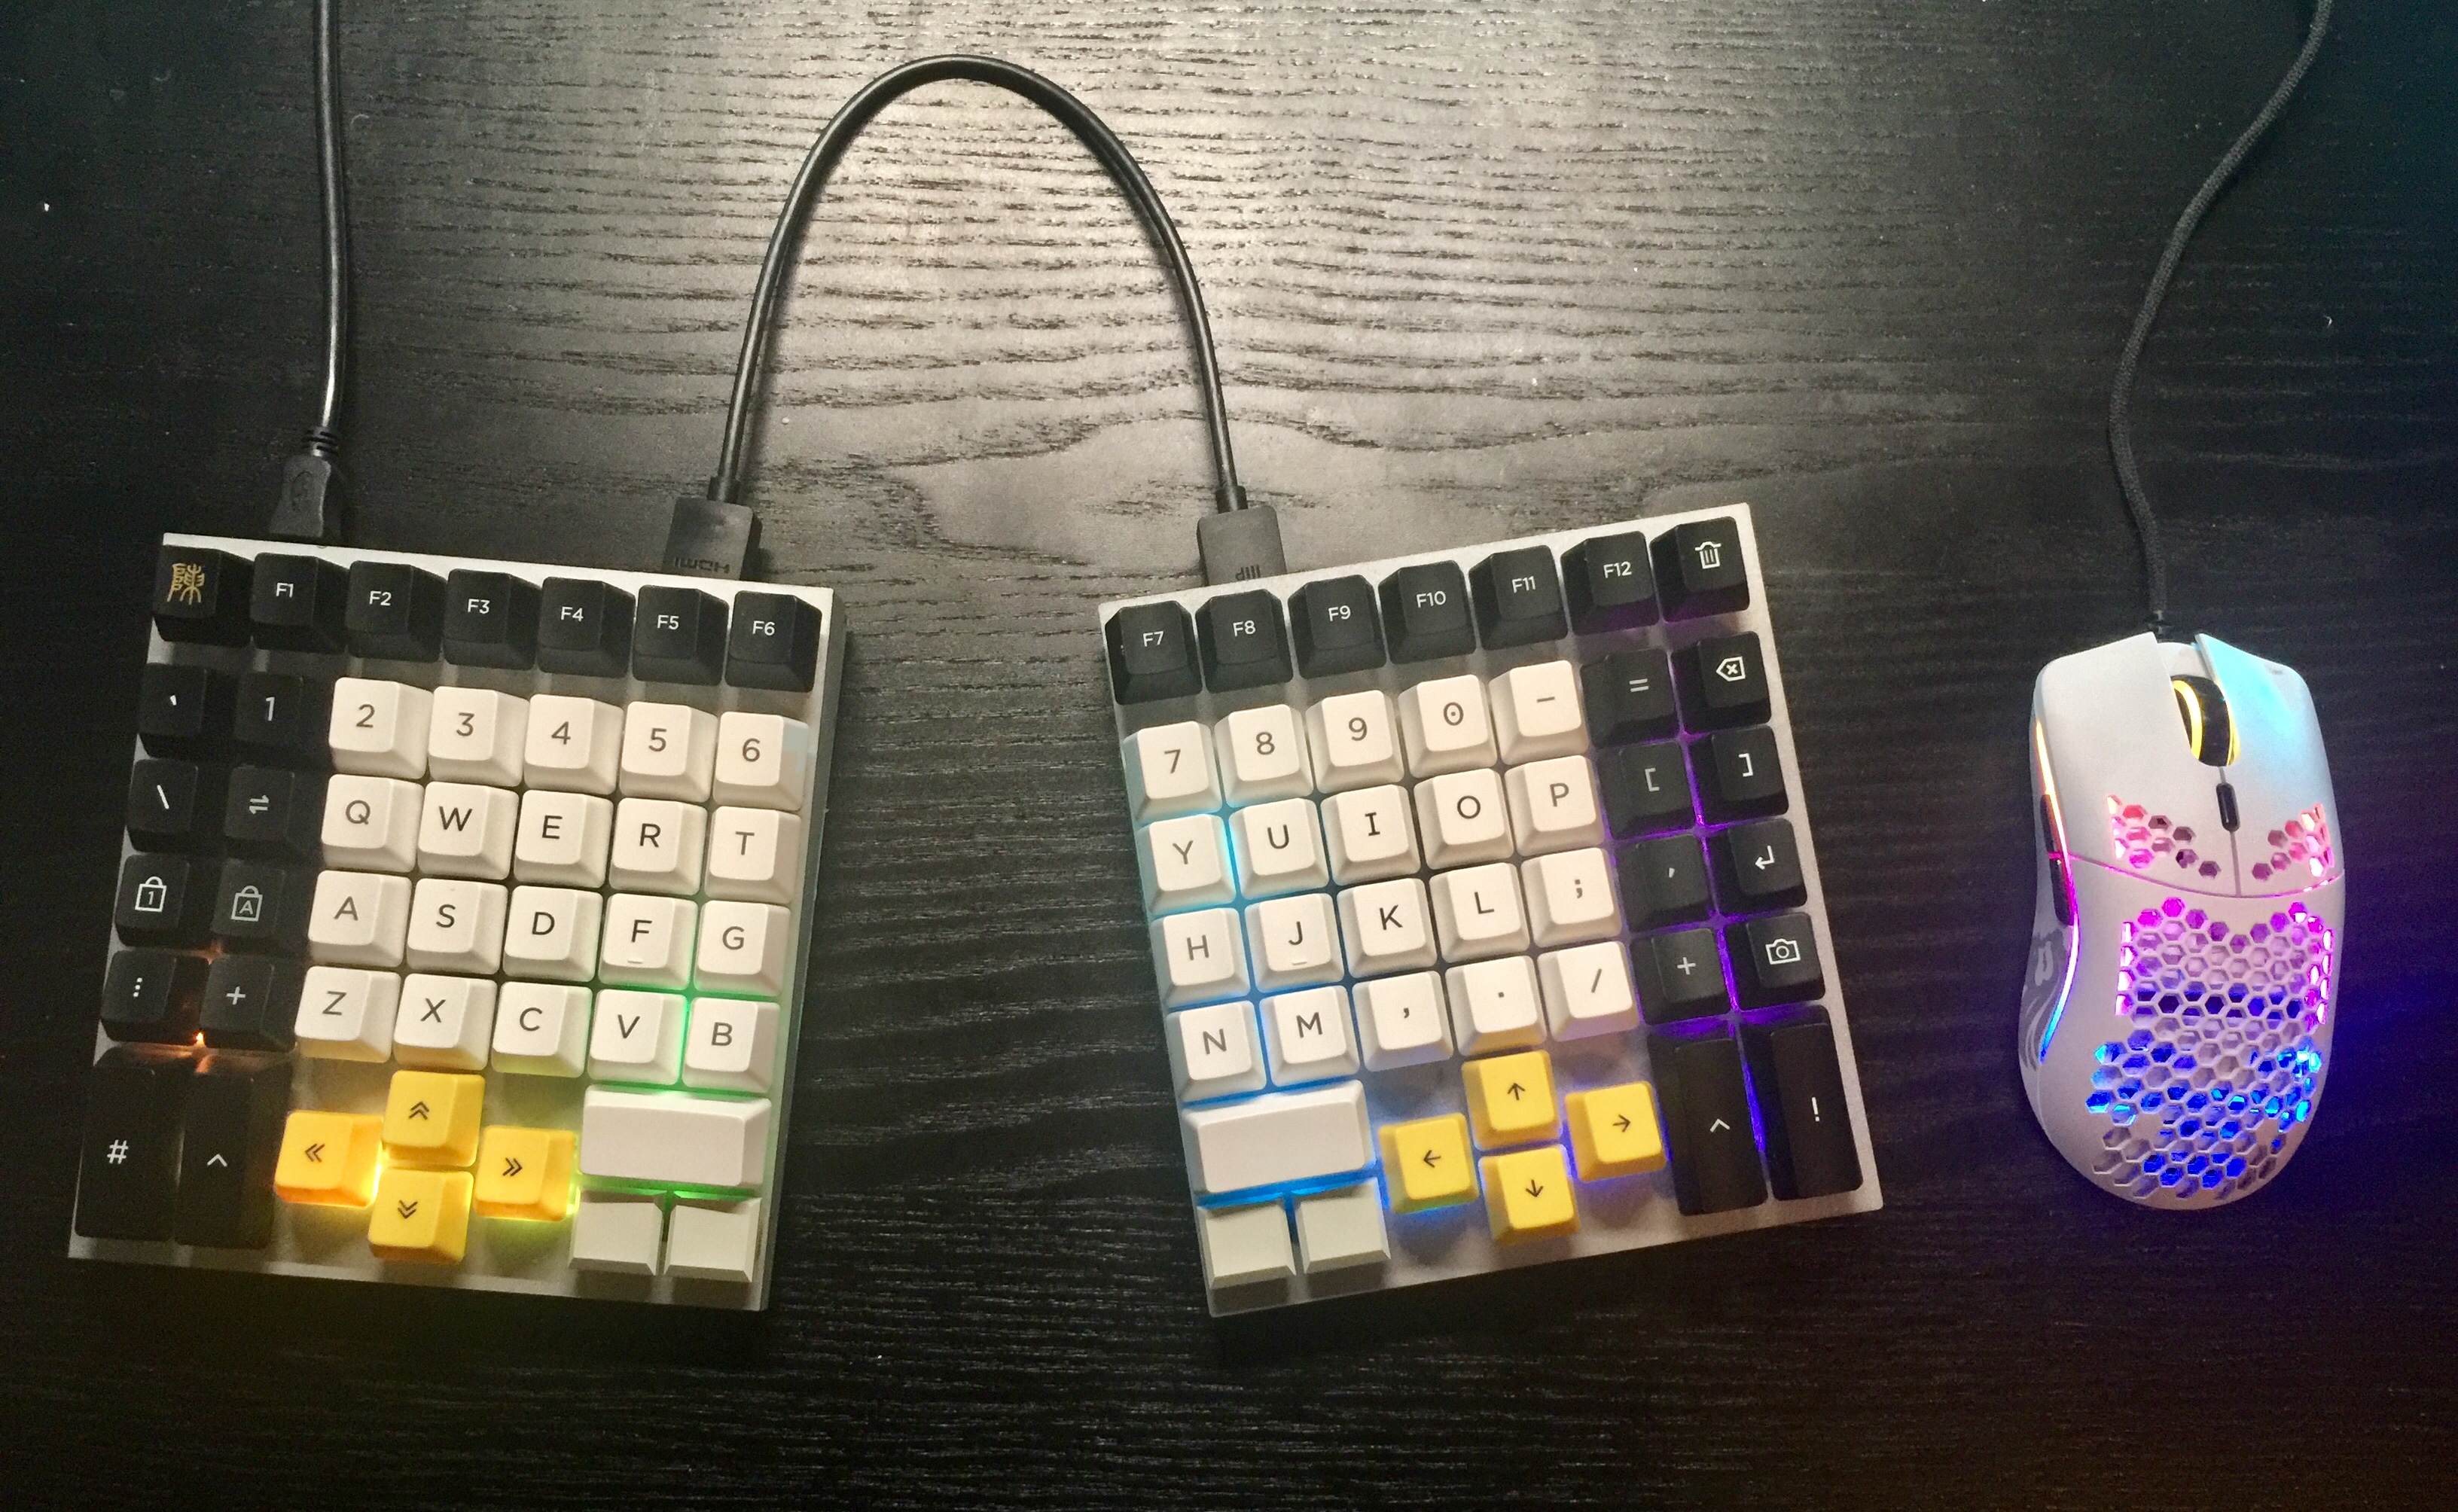
Finally got a big update from my cheap keyboard. This bad boy killed it!
- Keycaps: https://github.com/asianboii-chen/grid88_qmk_firmware/tree/master/design_sources/keycaps
- Cases: https://github.com/asianboii-chen/grid88_qmk_firmware/tree/master/design_sources/cases
- 3D-Preview the Cases: https://a360.co/3dU7cbU
- Firmware: this repository :D
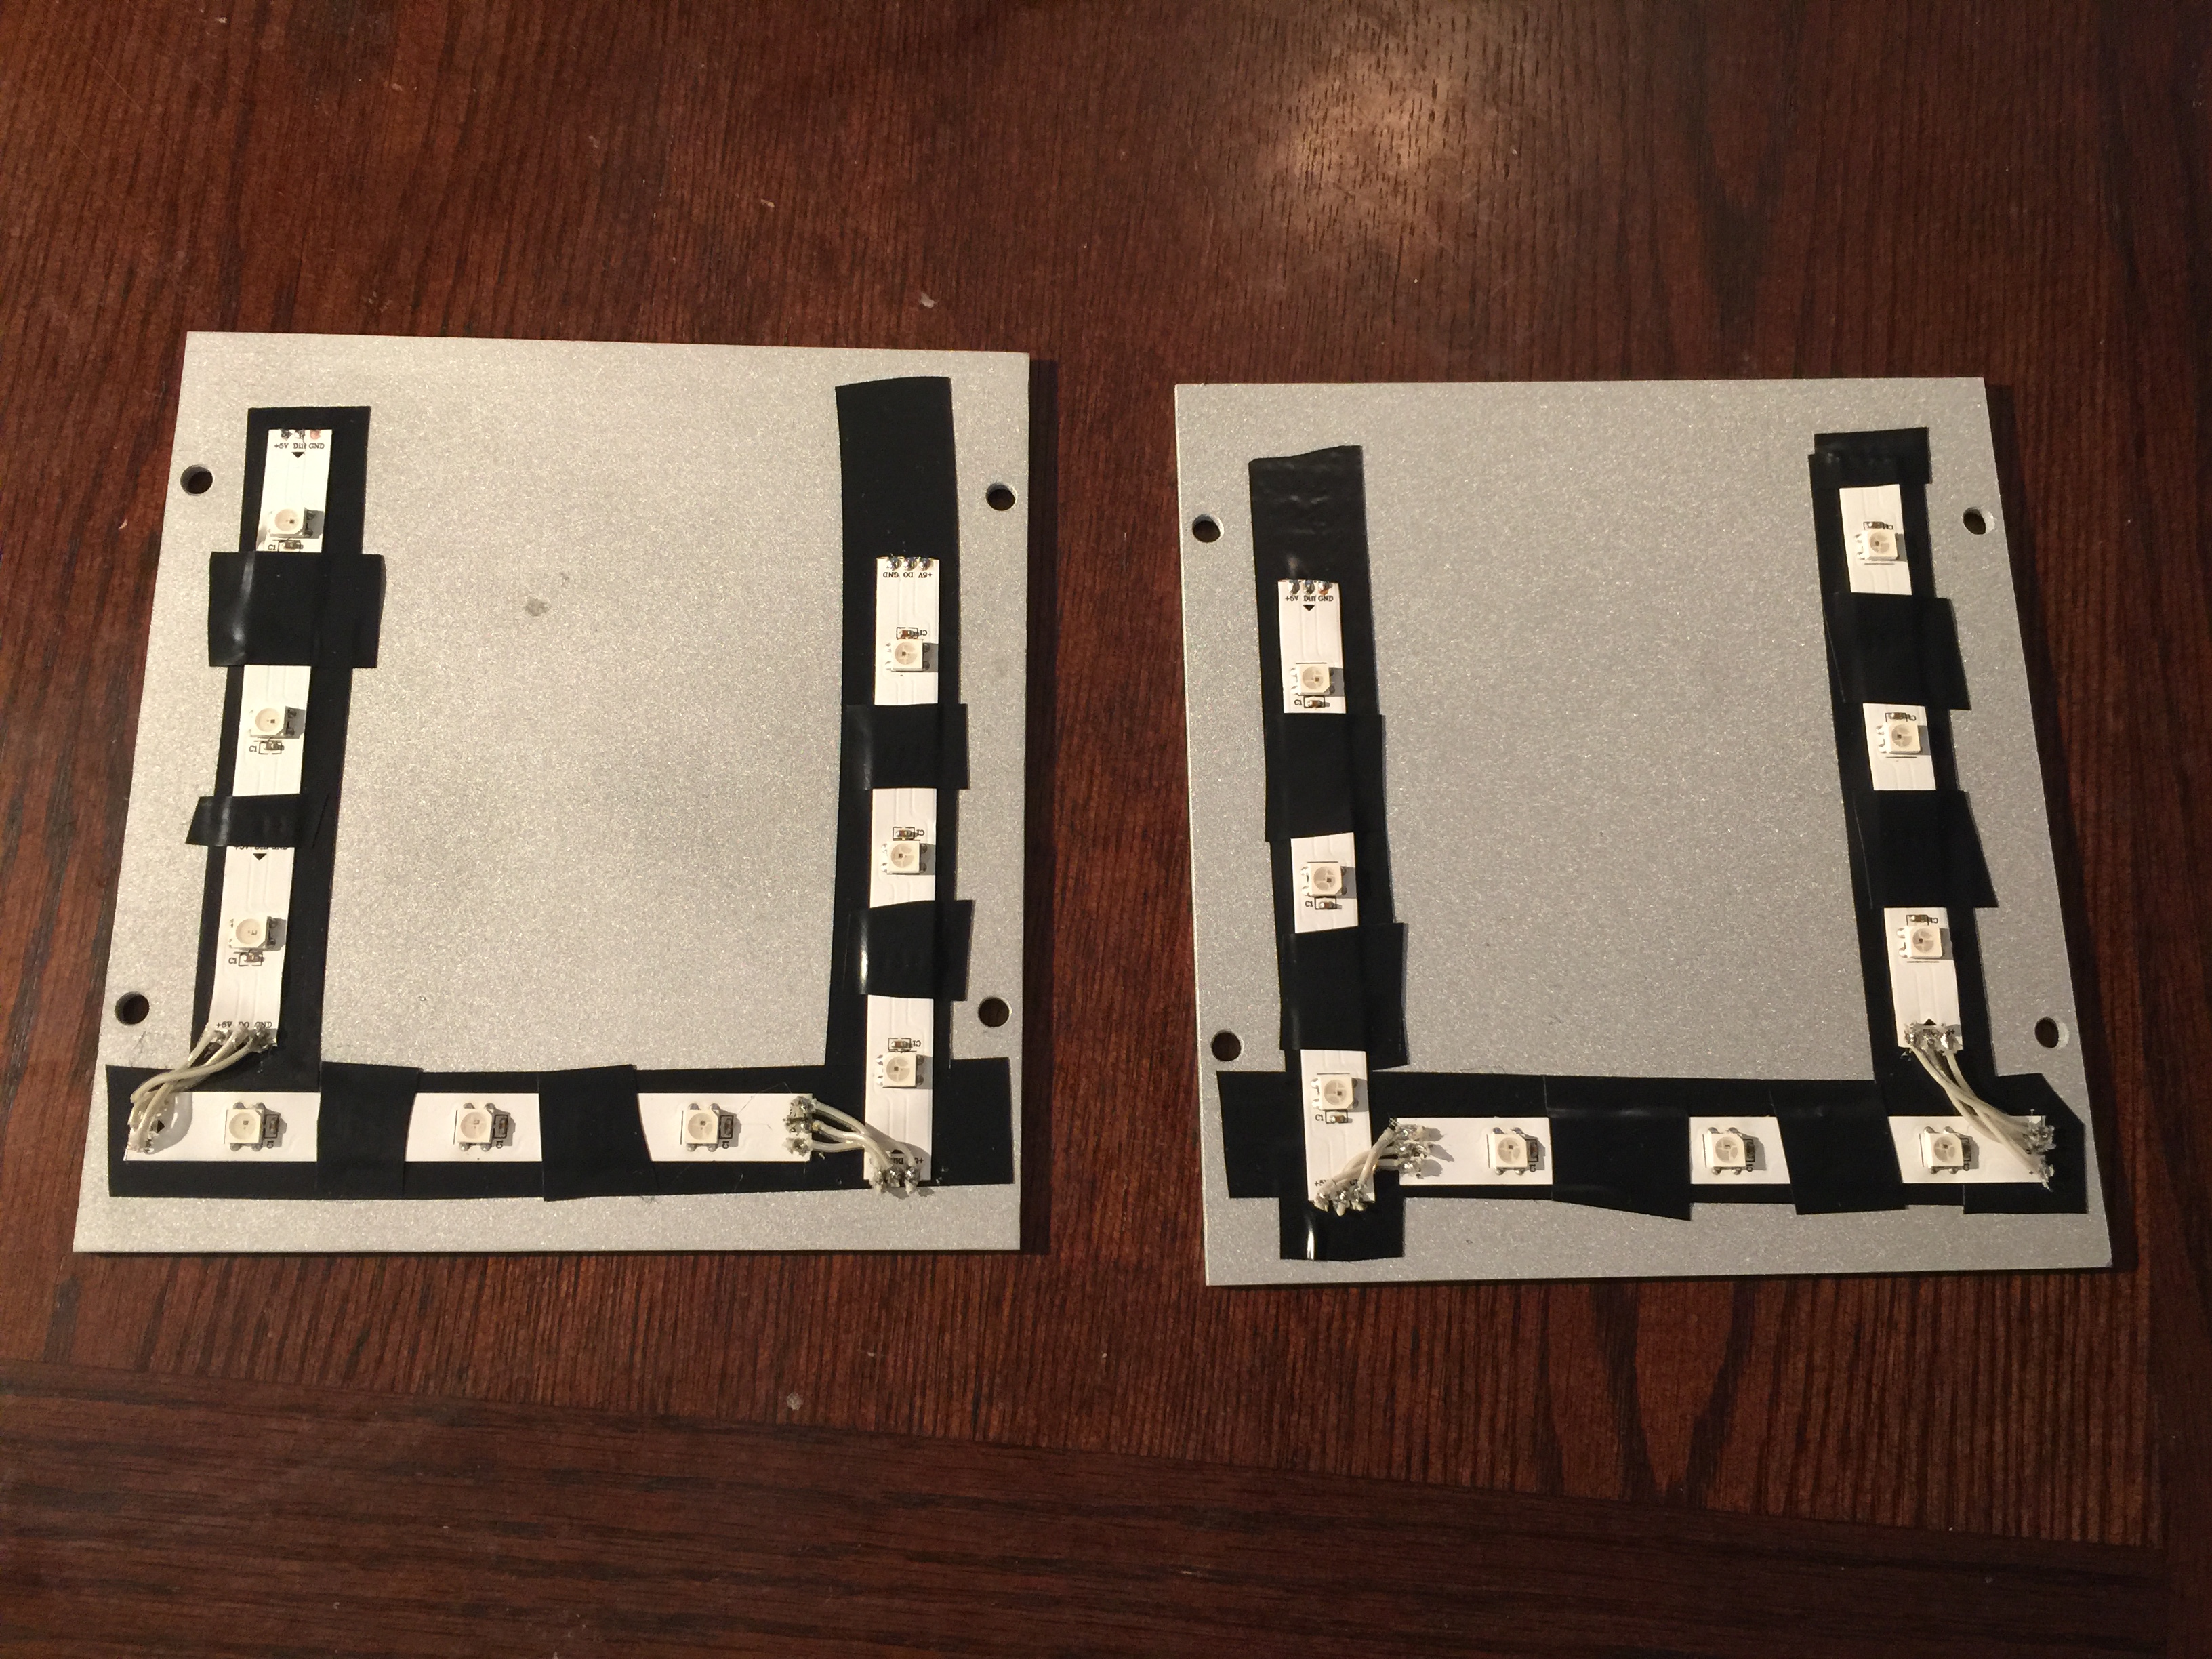
These are the components I prepared and used for building this keyboard:
- 1 pair of aluminum+acrylic cases by ACP Precision
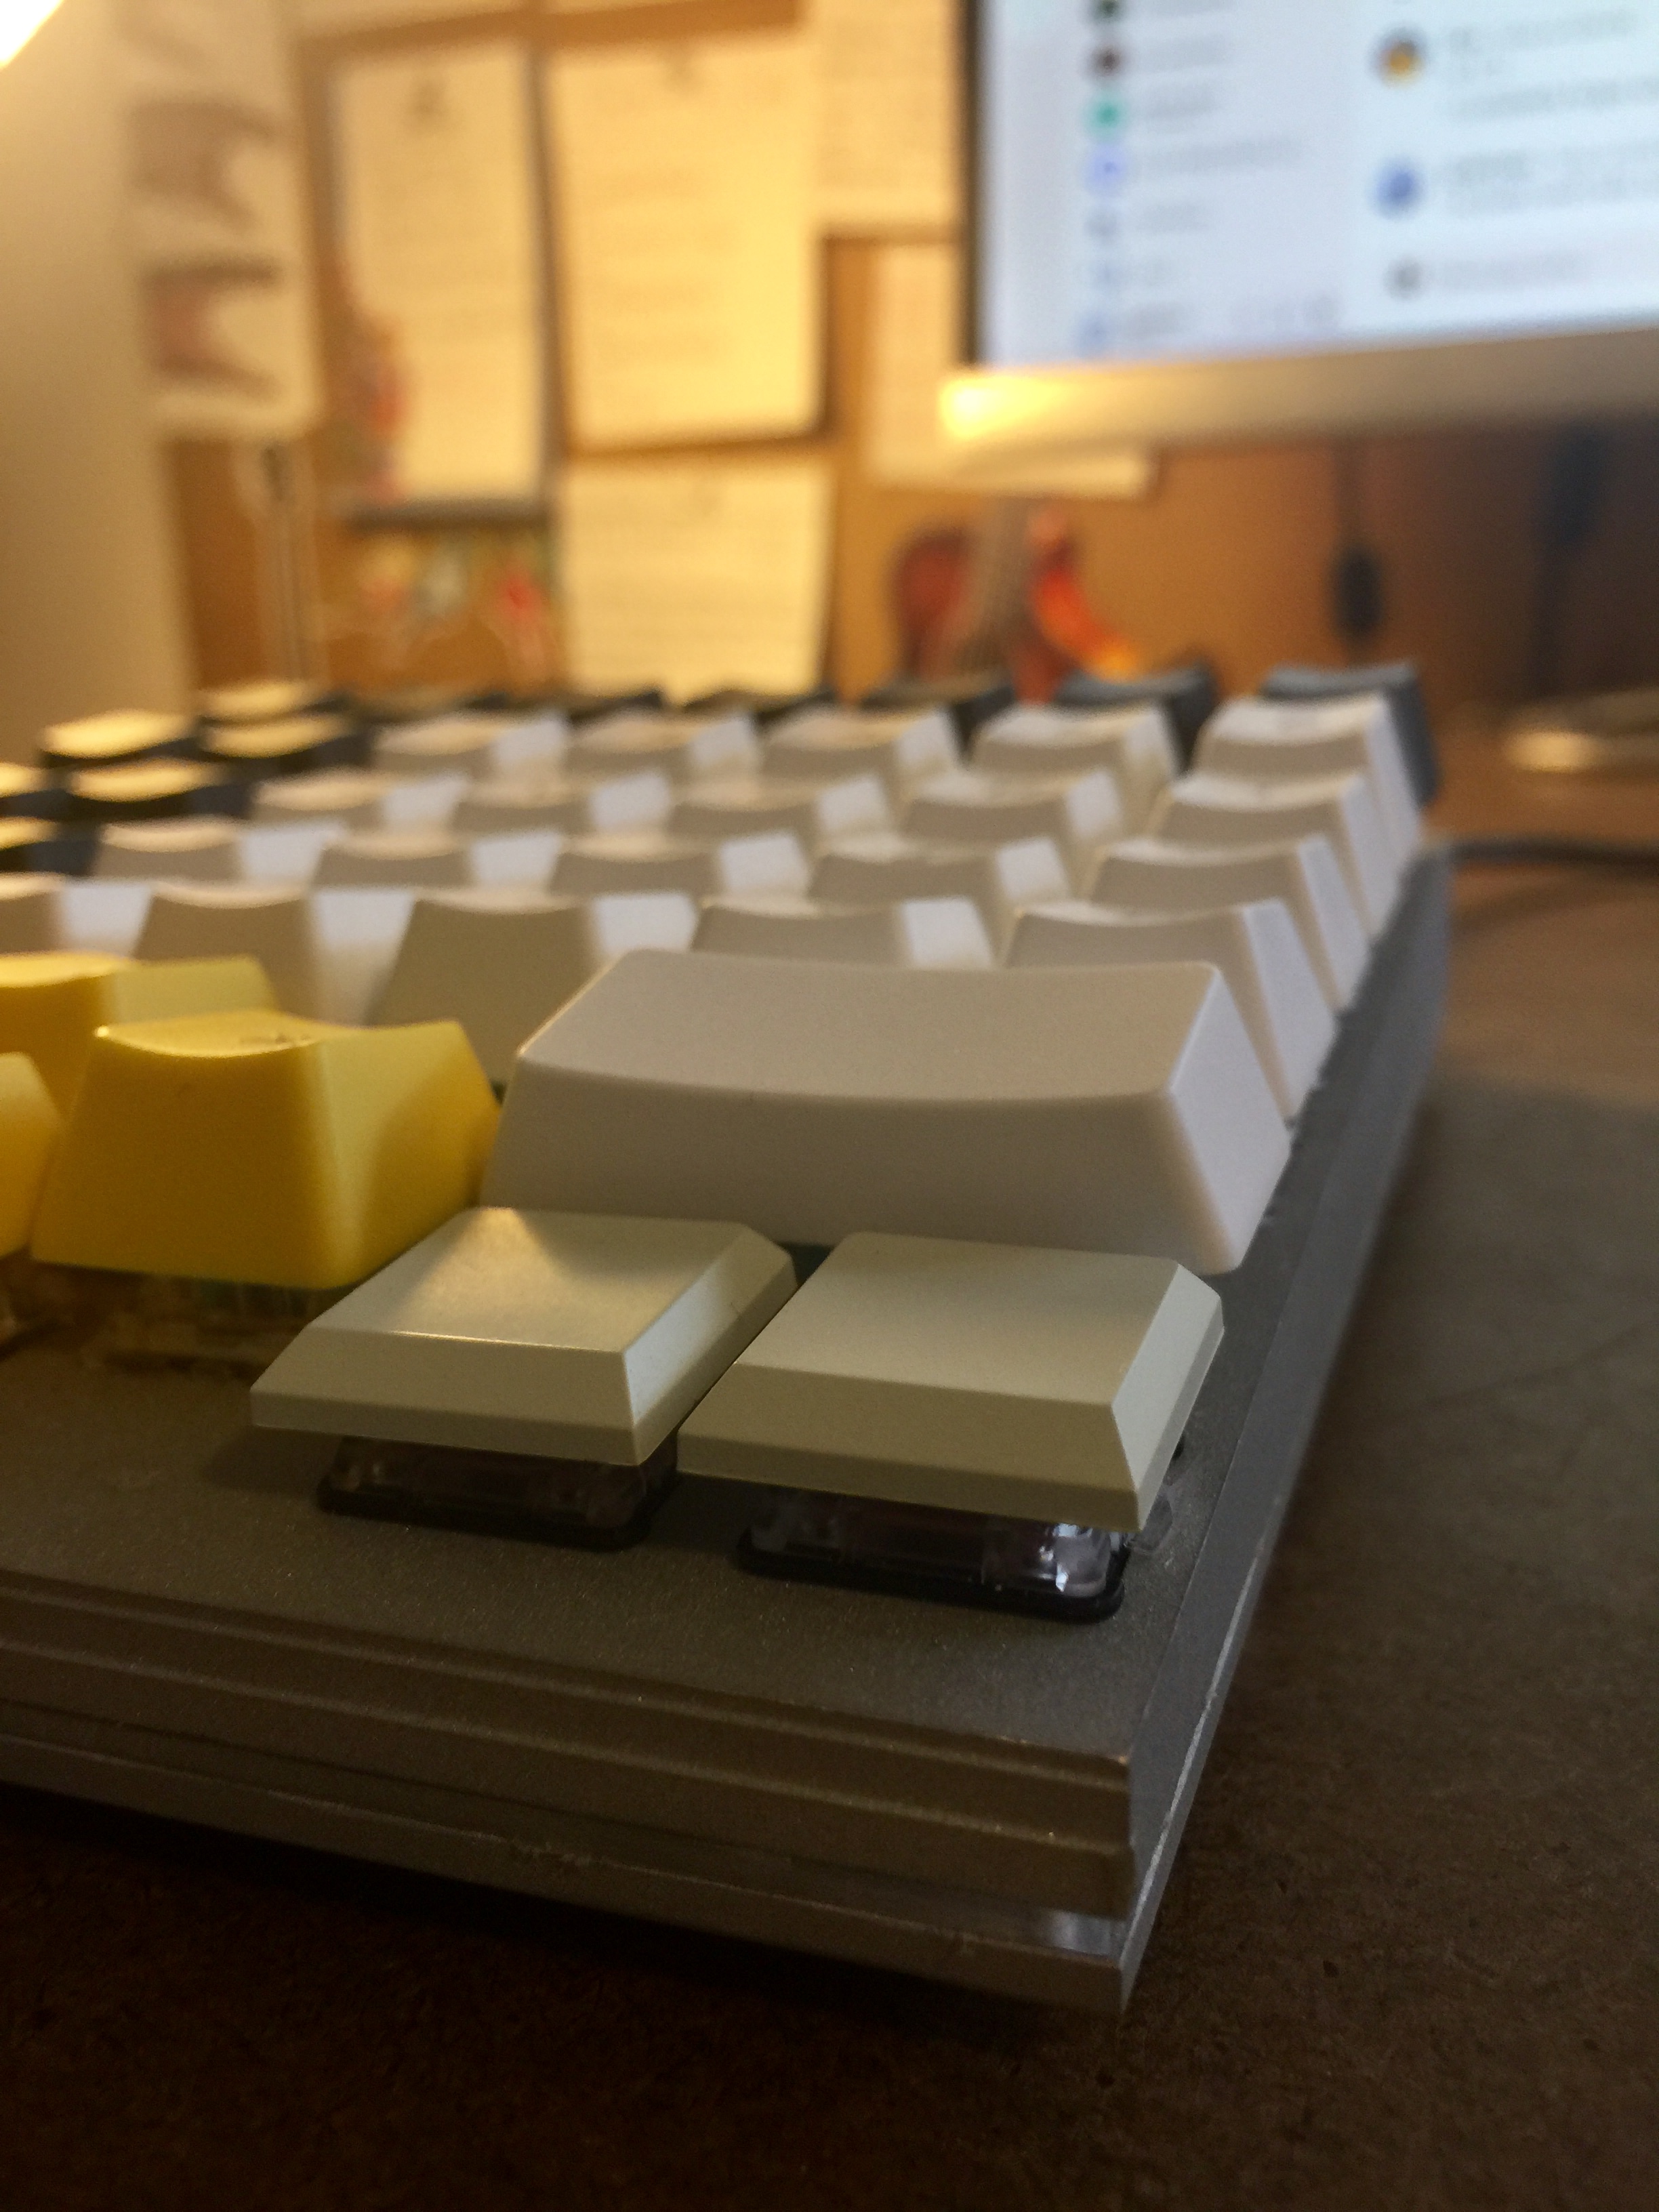
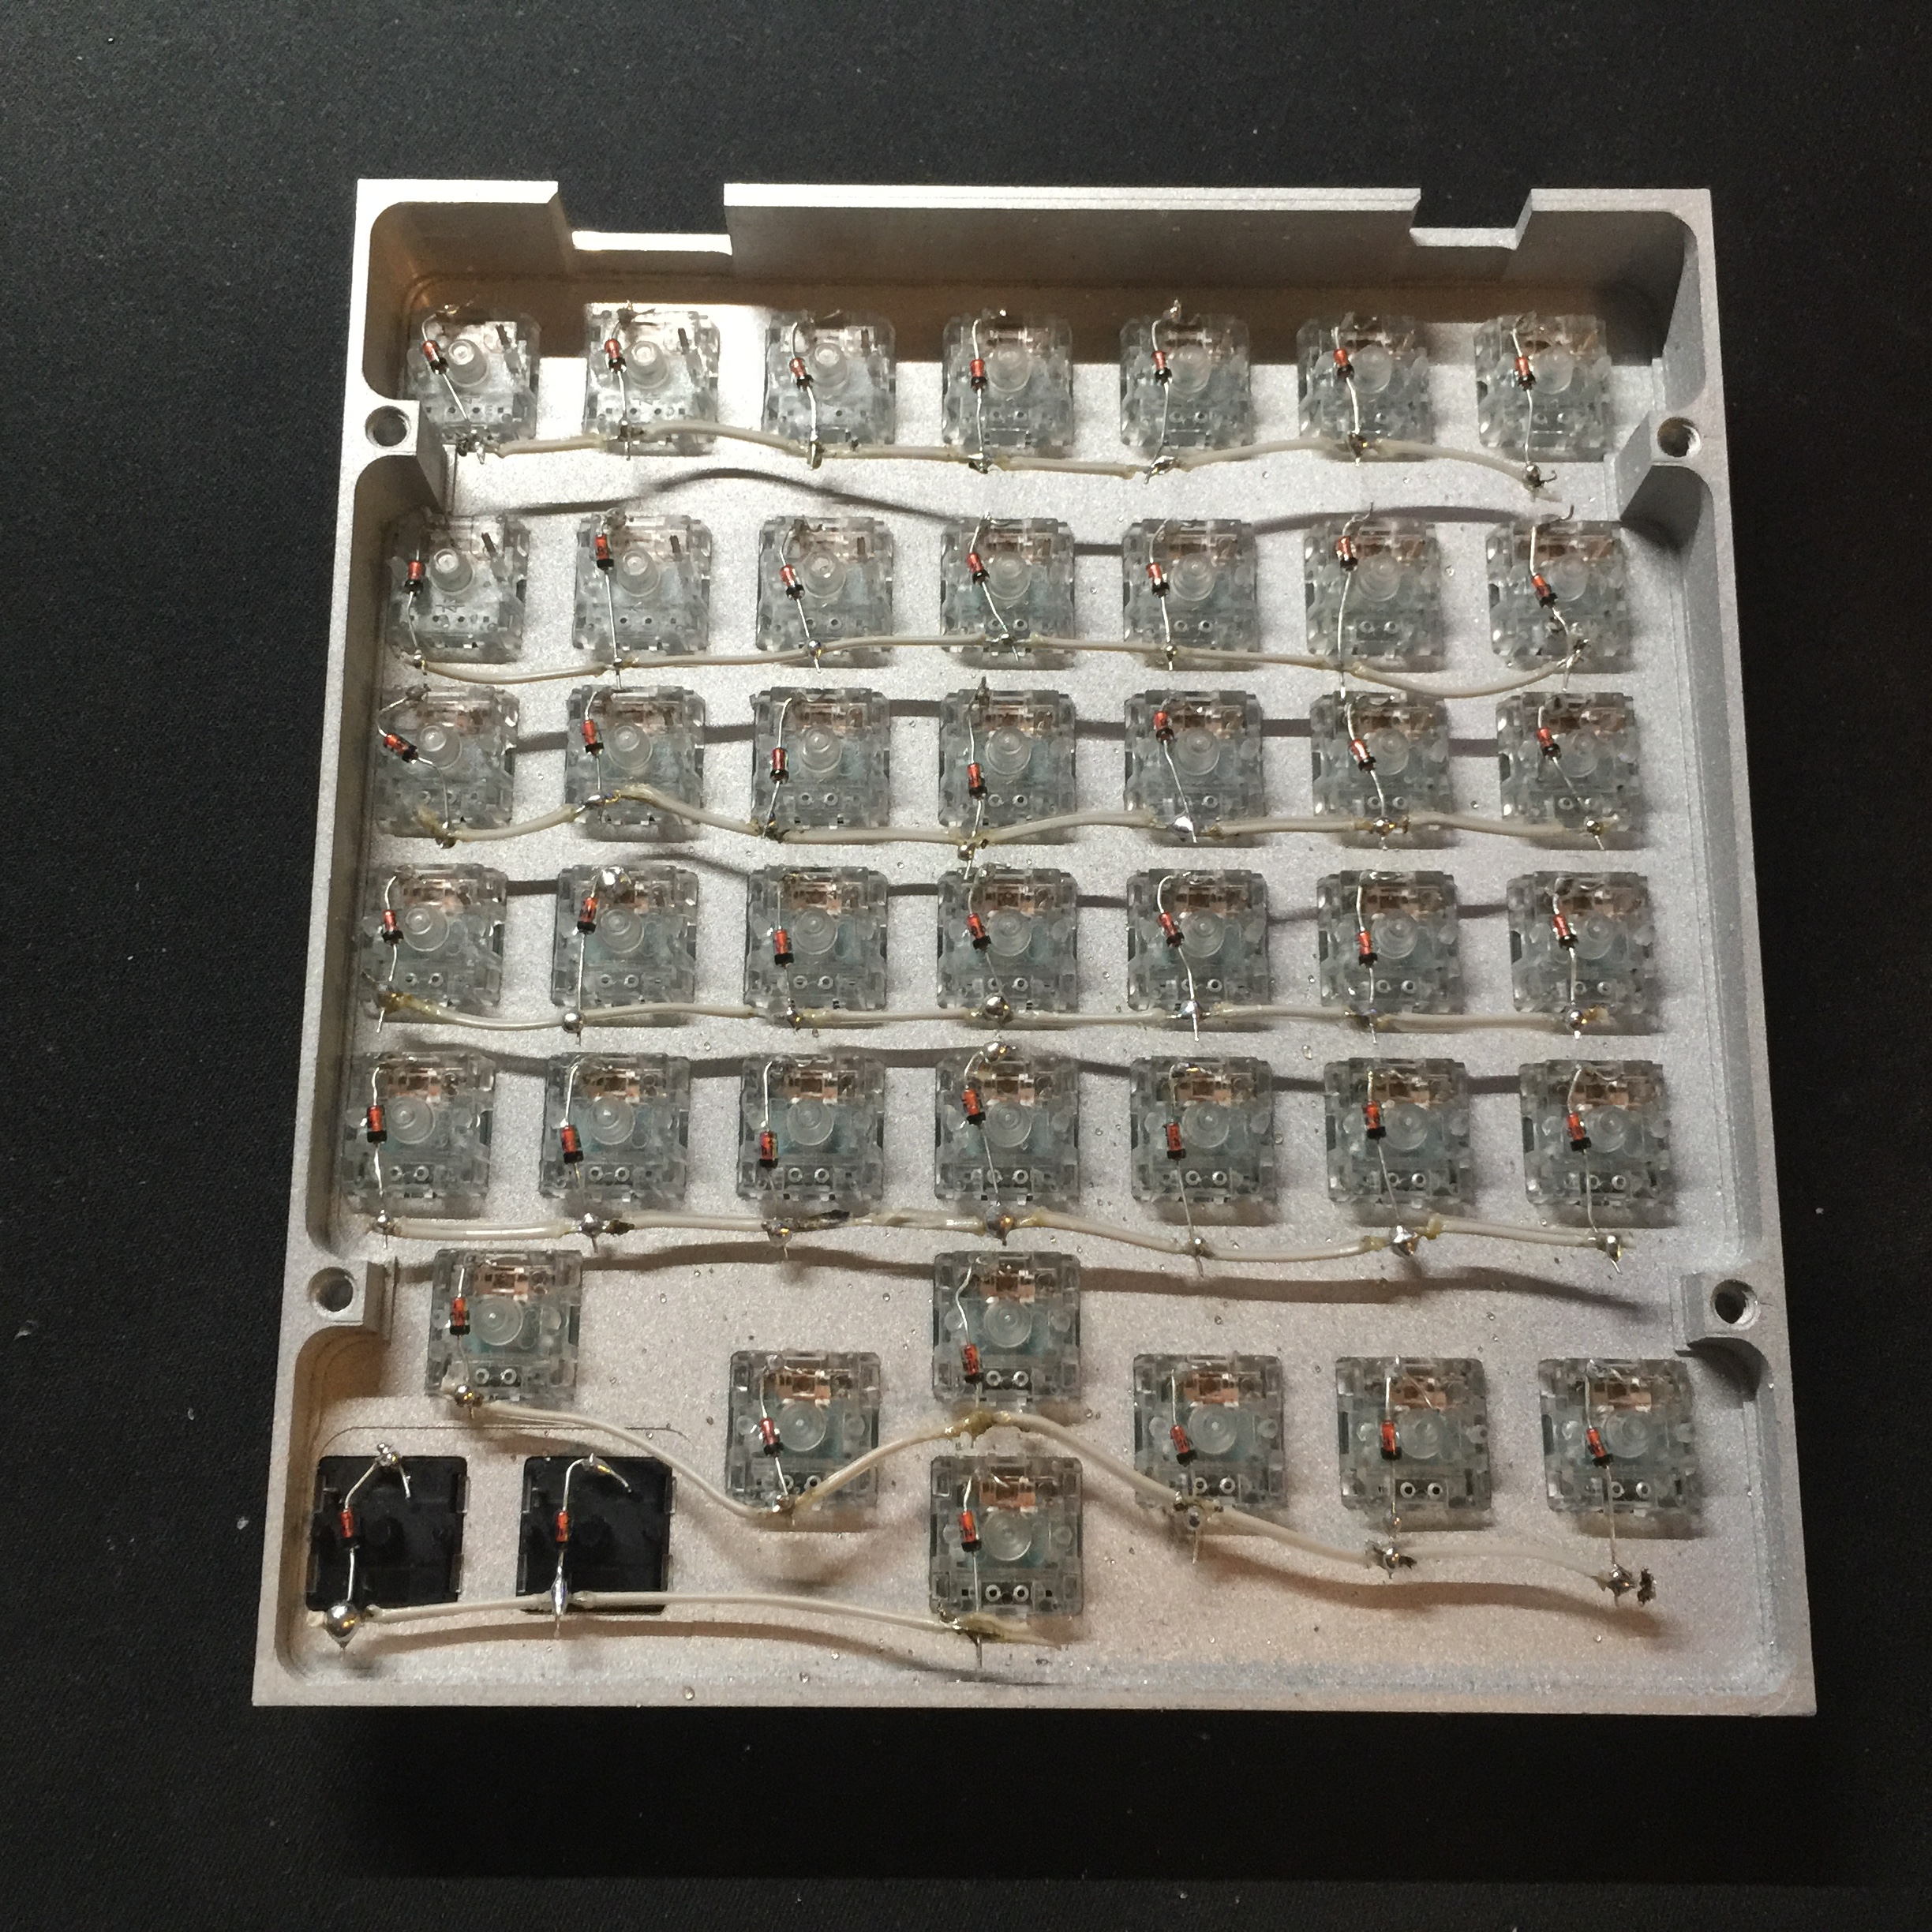
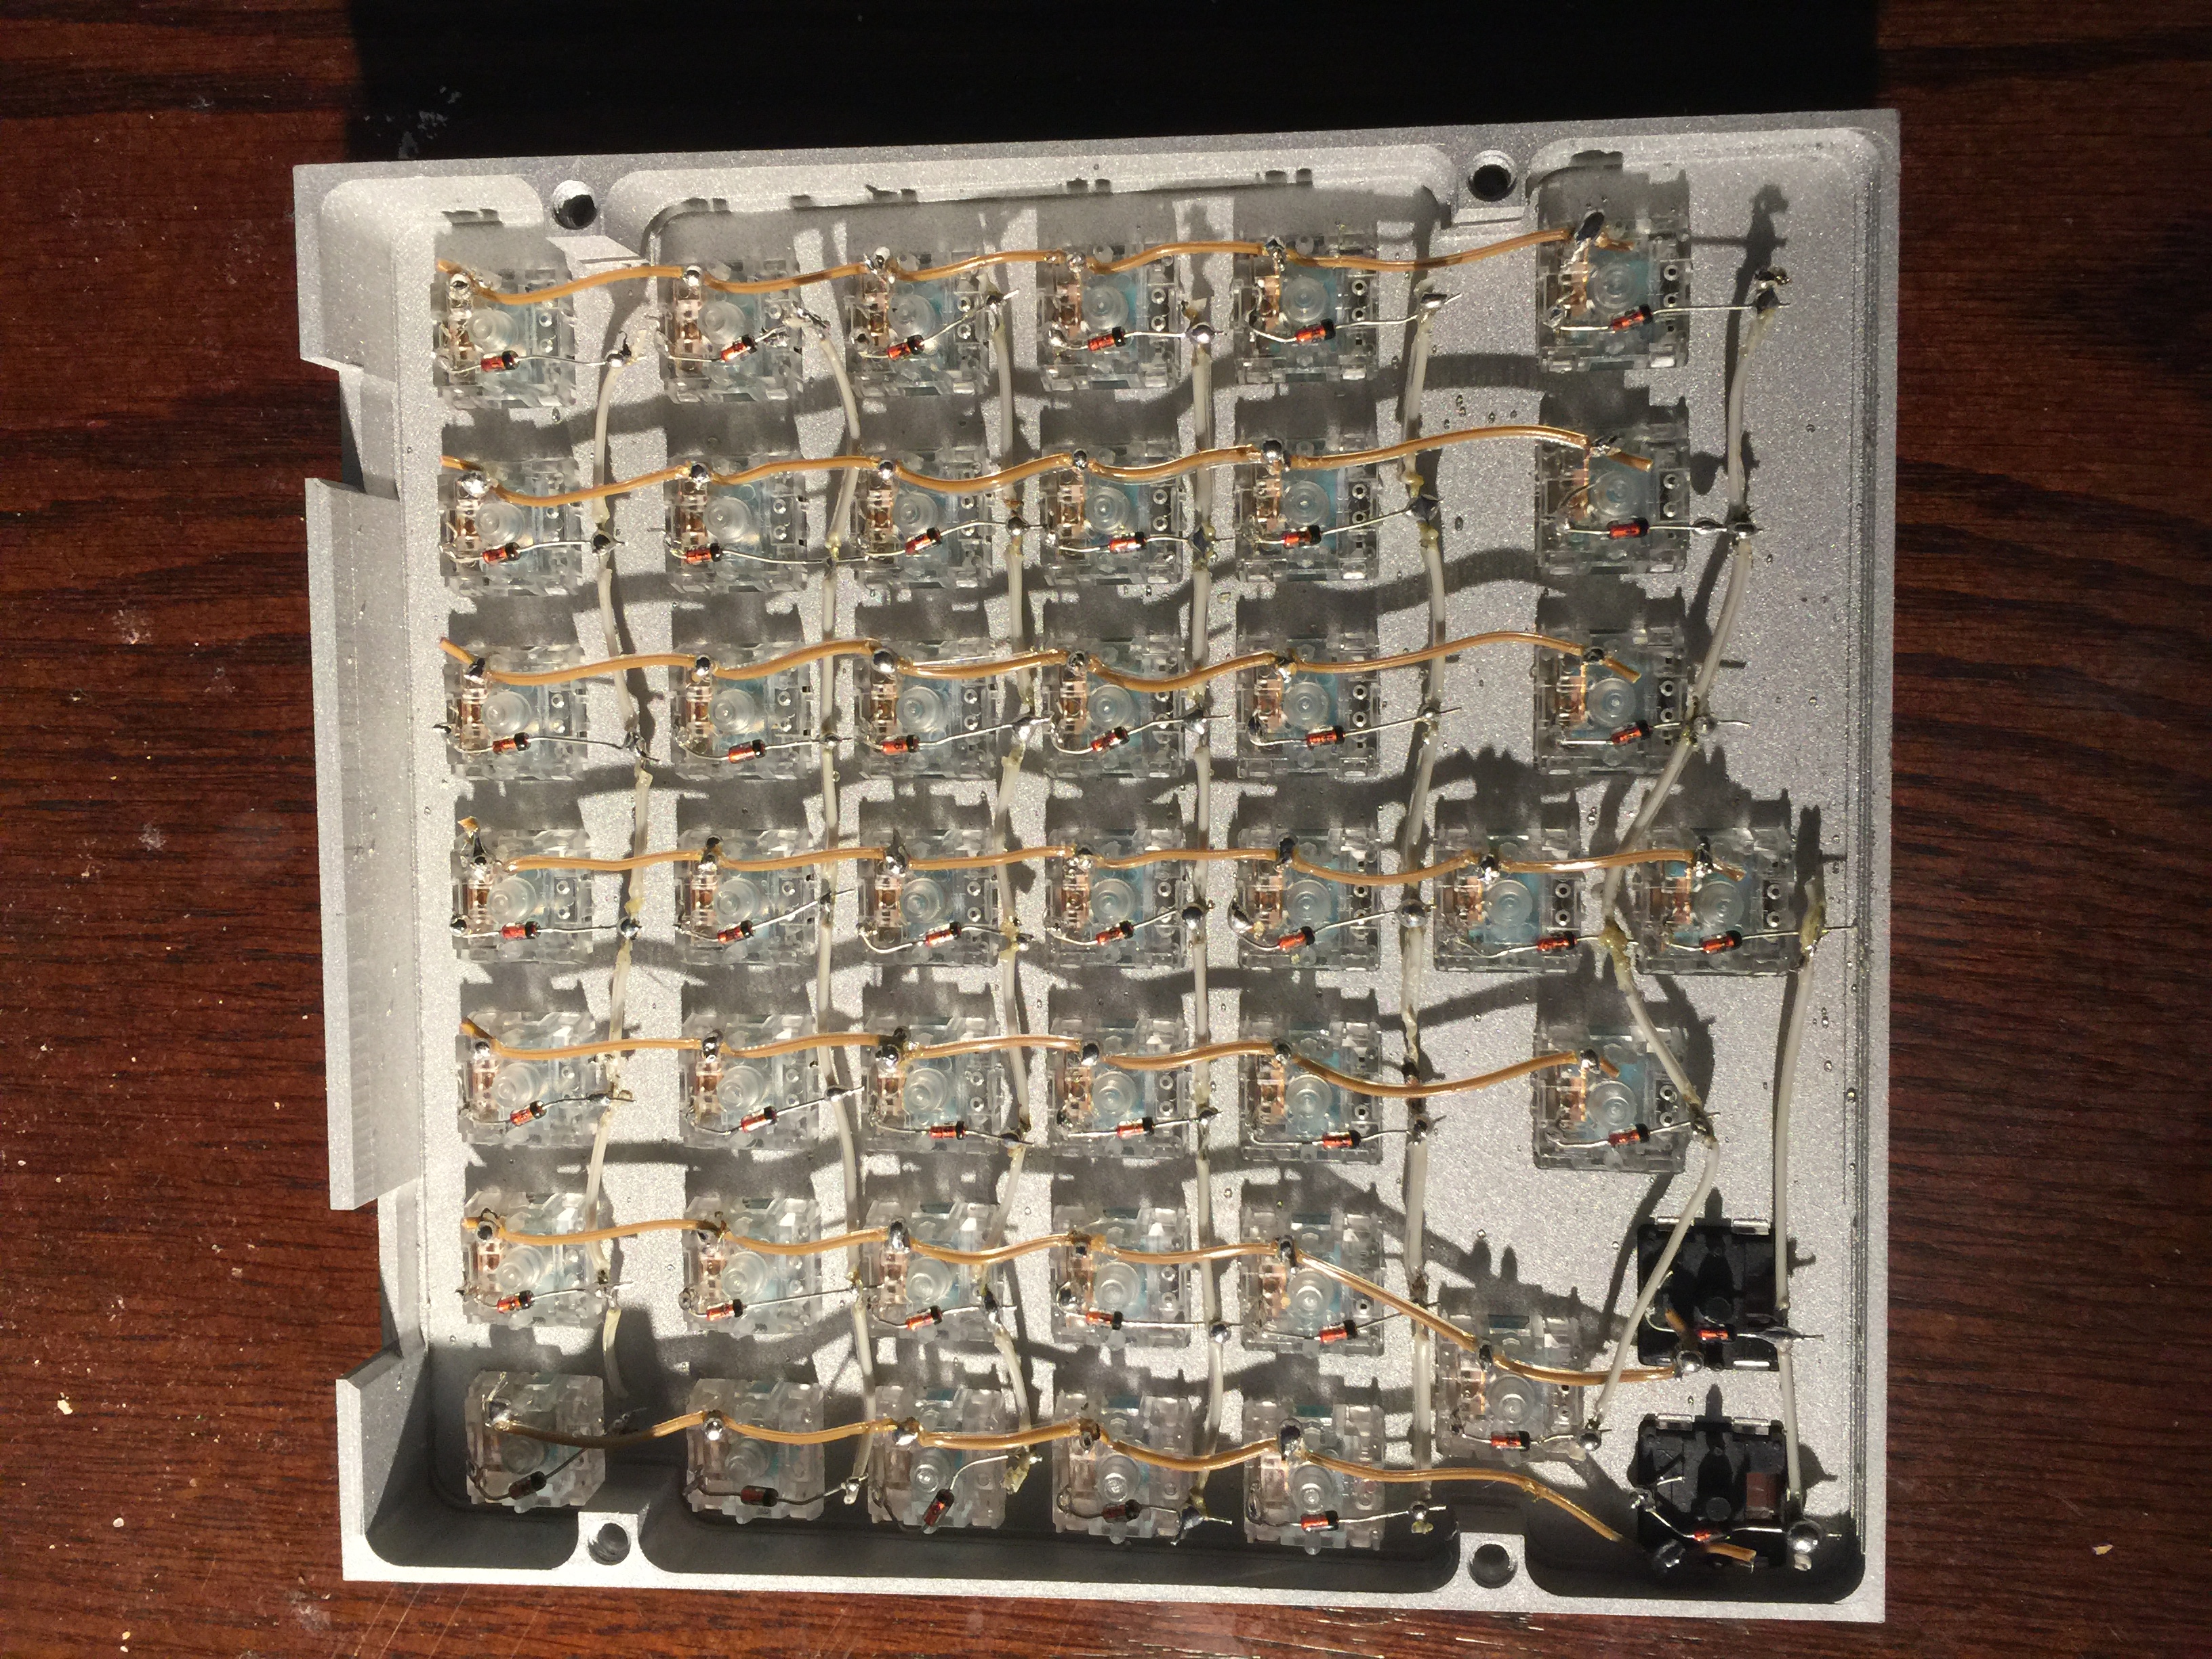
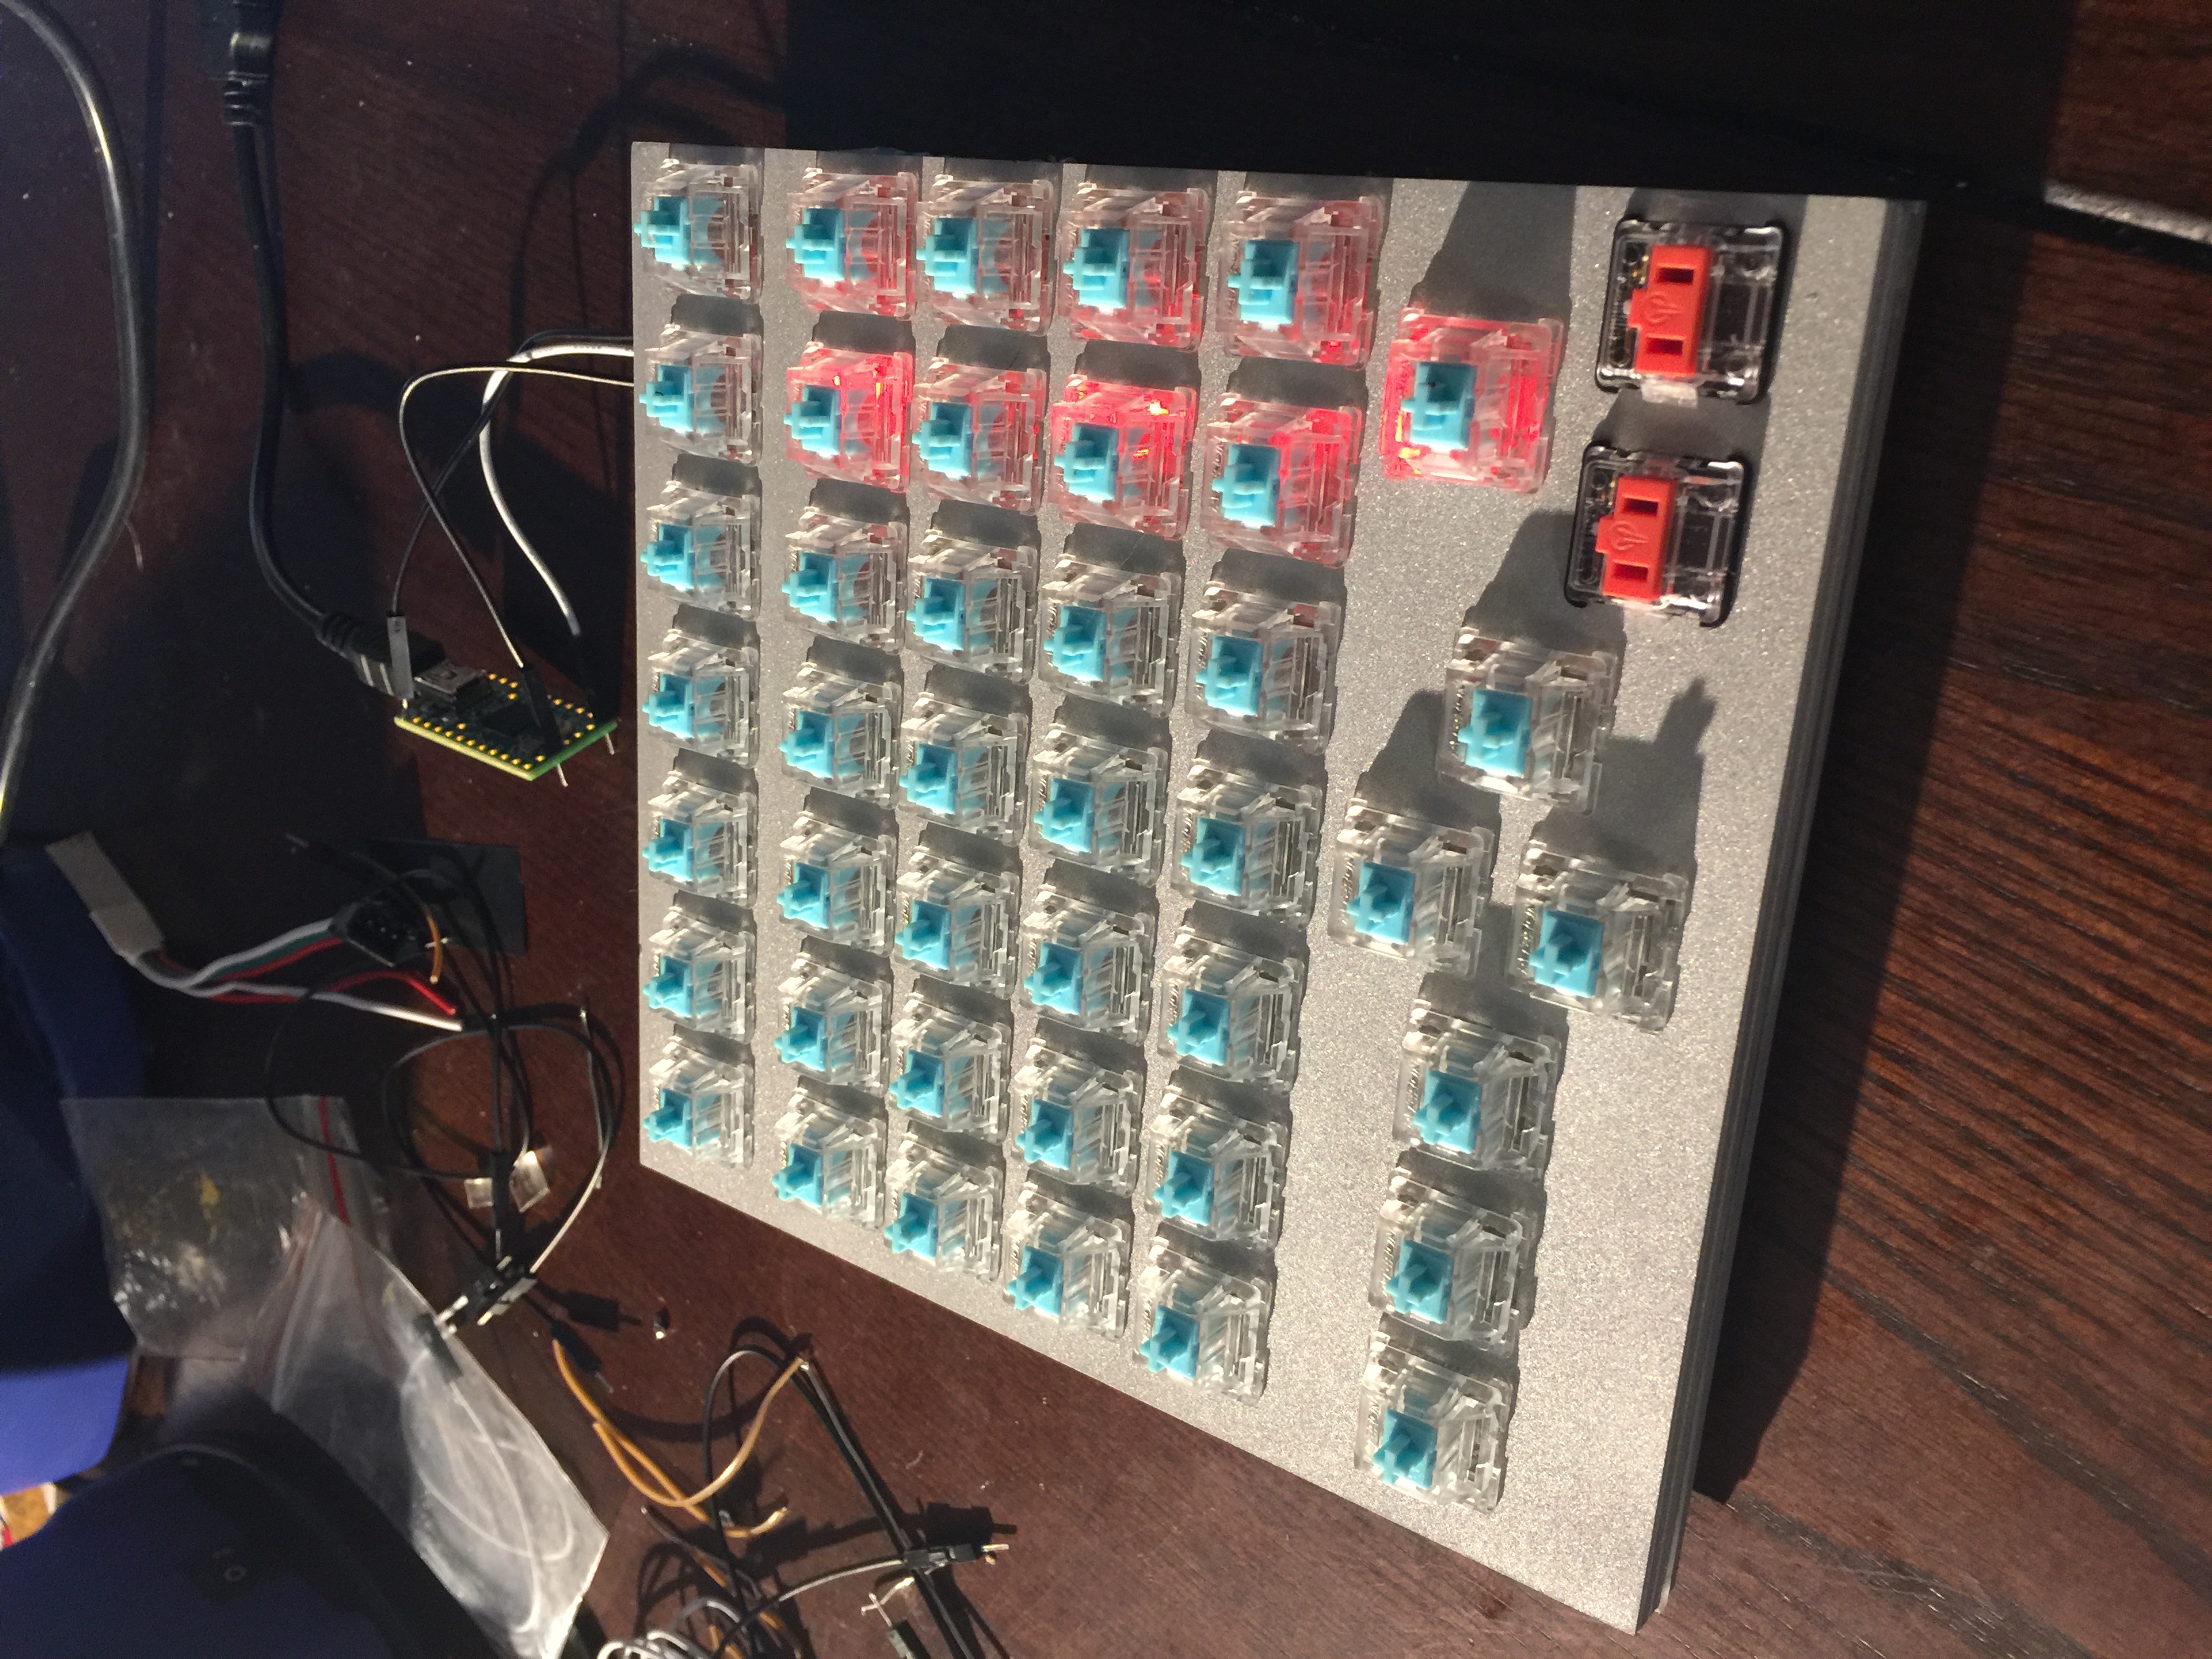
- 84 Zeal Zilent switches
- Spring-swapped with Sprit MX Supreme 50G (35g actuation, 50g bottom out)
- 4 Kailh Choc Orange switches
- Spring-swapped with Sprit Choc 35G (35g actuation, 45g bottom out)
- All switches lubed with Tribosys 3204 on housings and springs, borrowed from Kevin
- 1 custom ISO keycap set on Maxkeyboard (OEM profile)
- 4 Kailh Choc keycaps
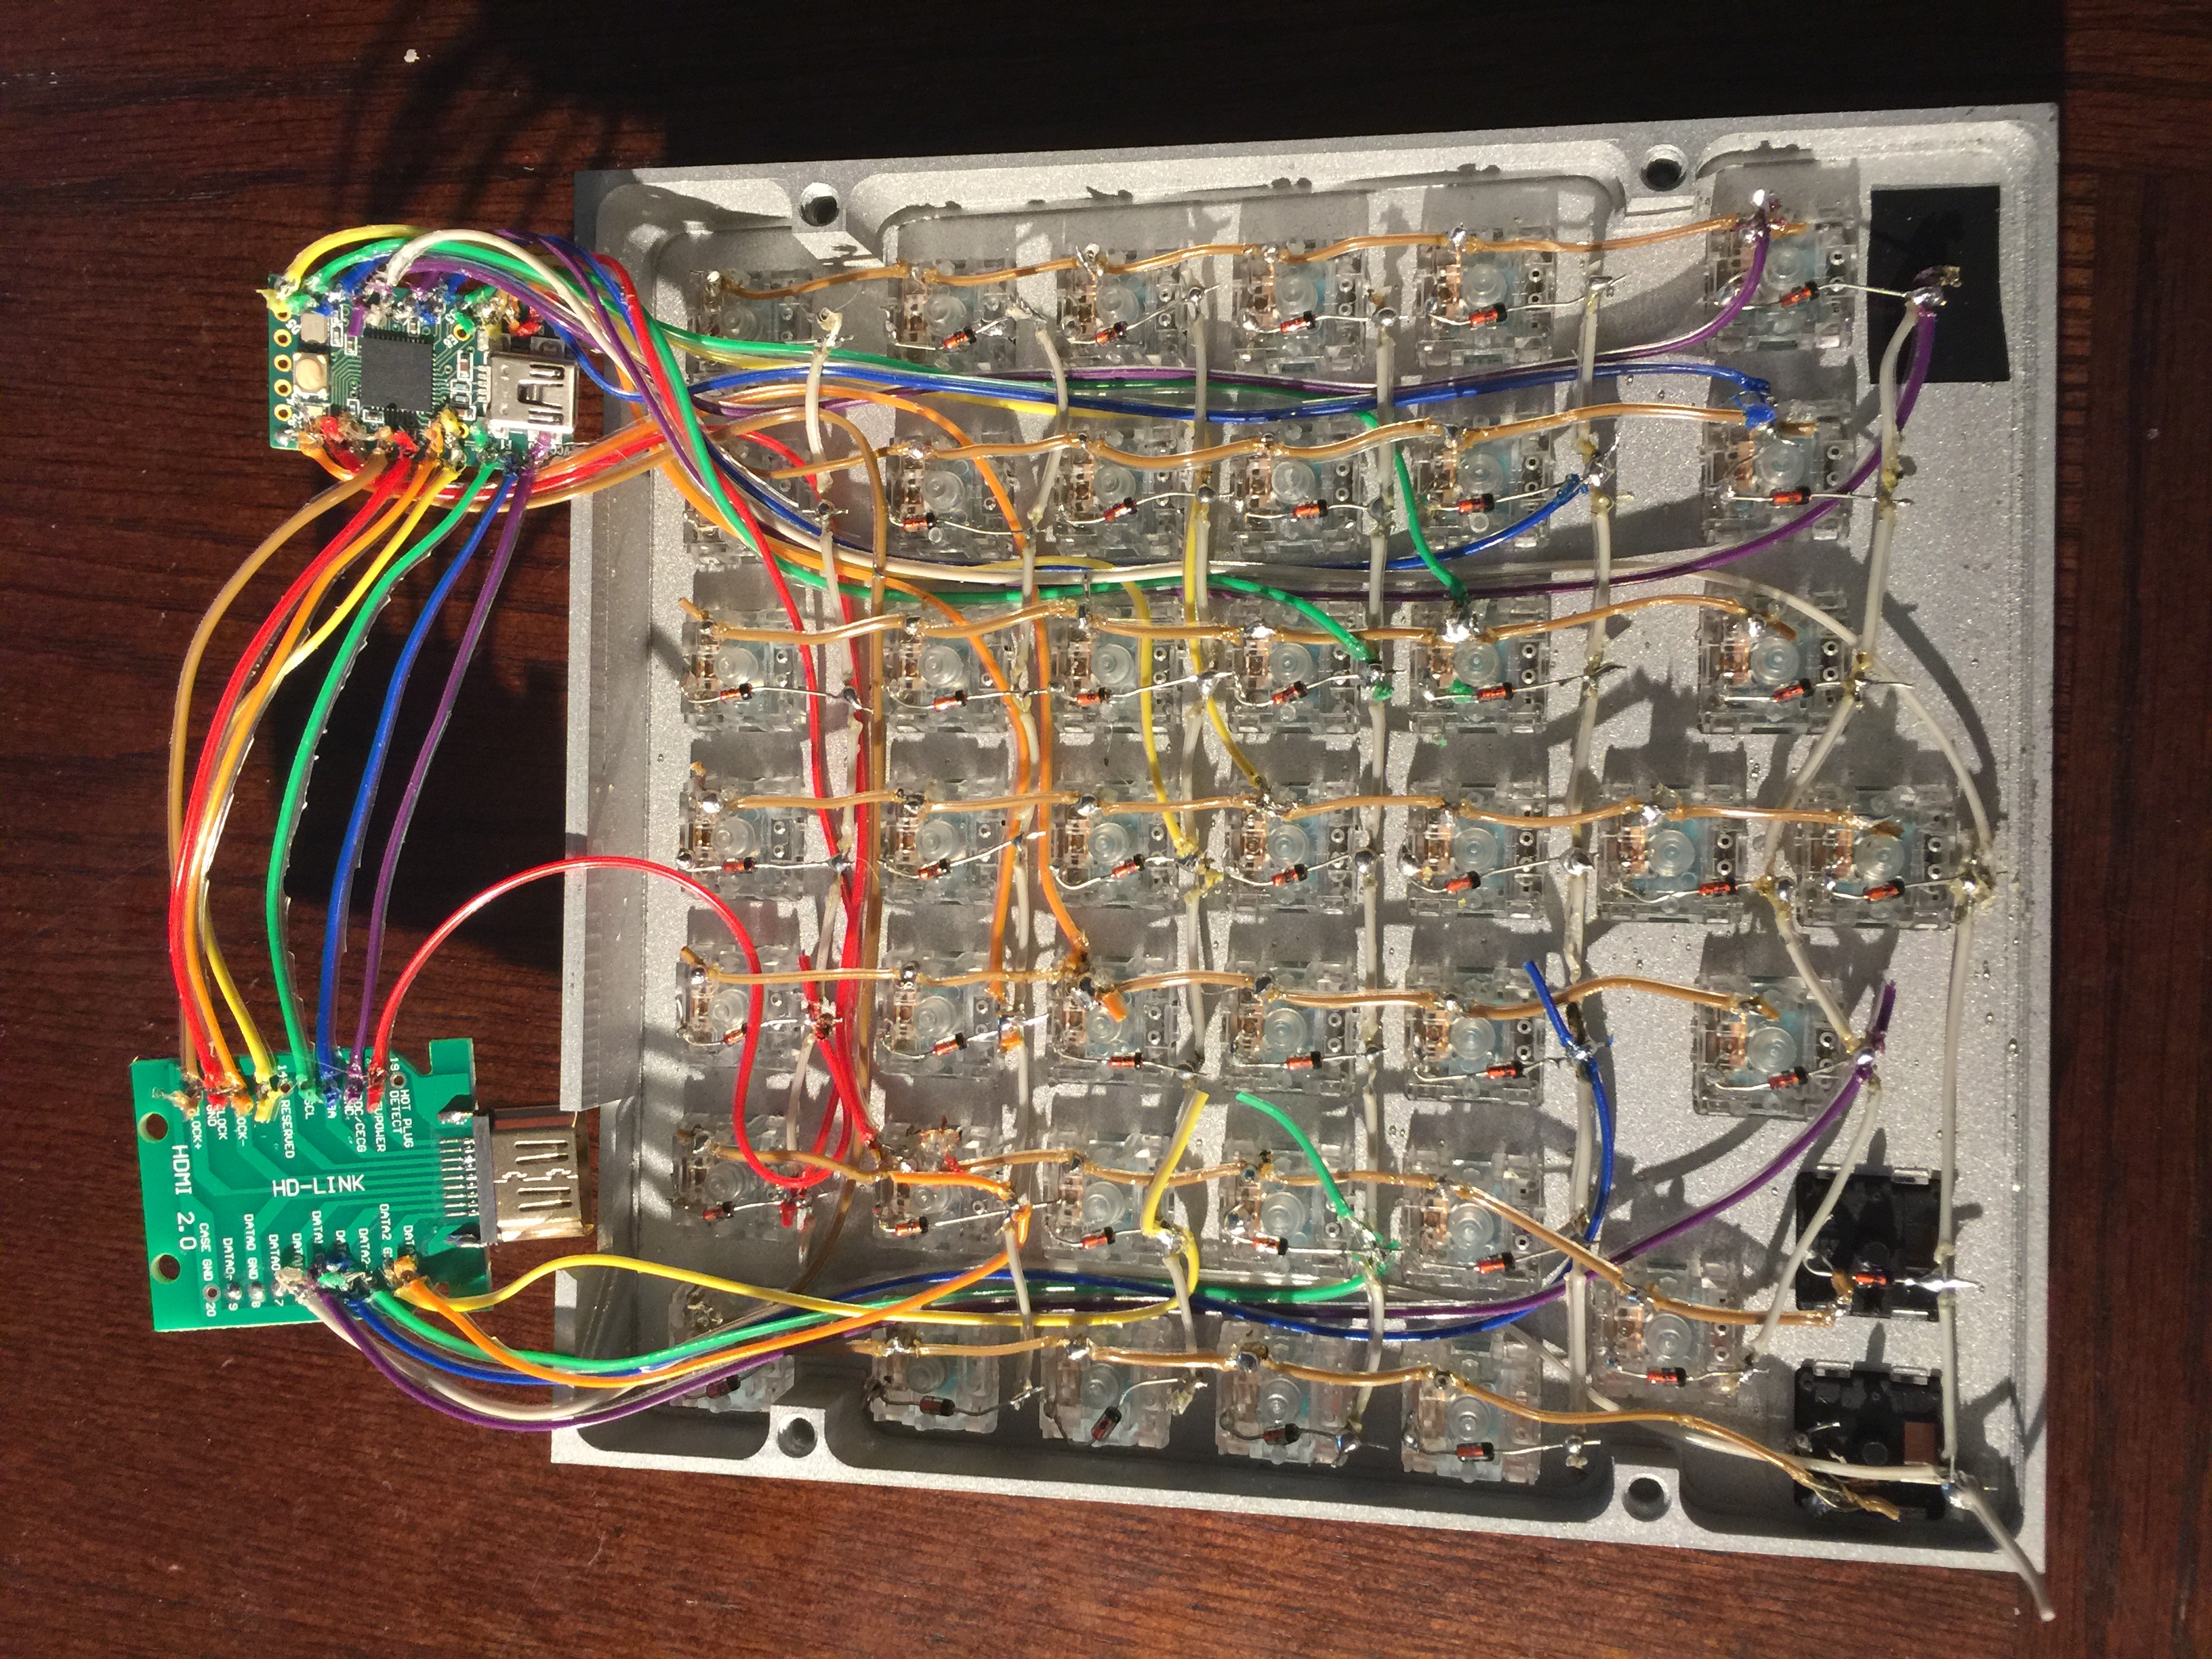
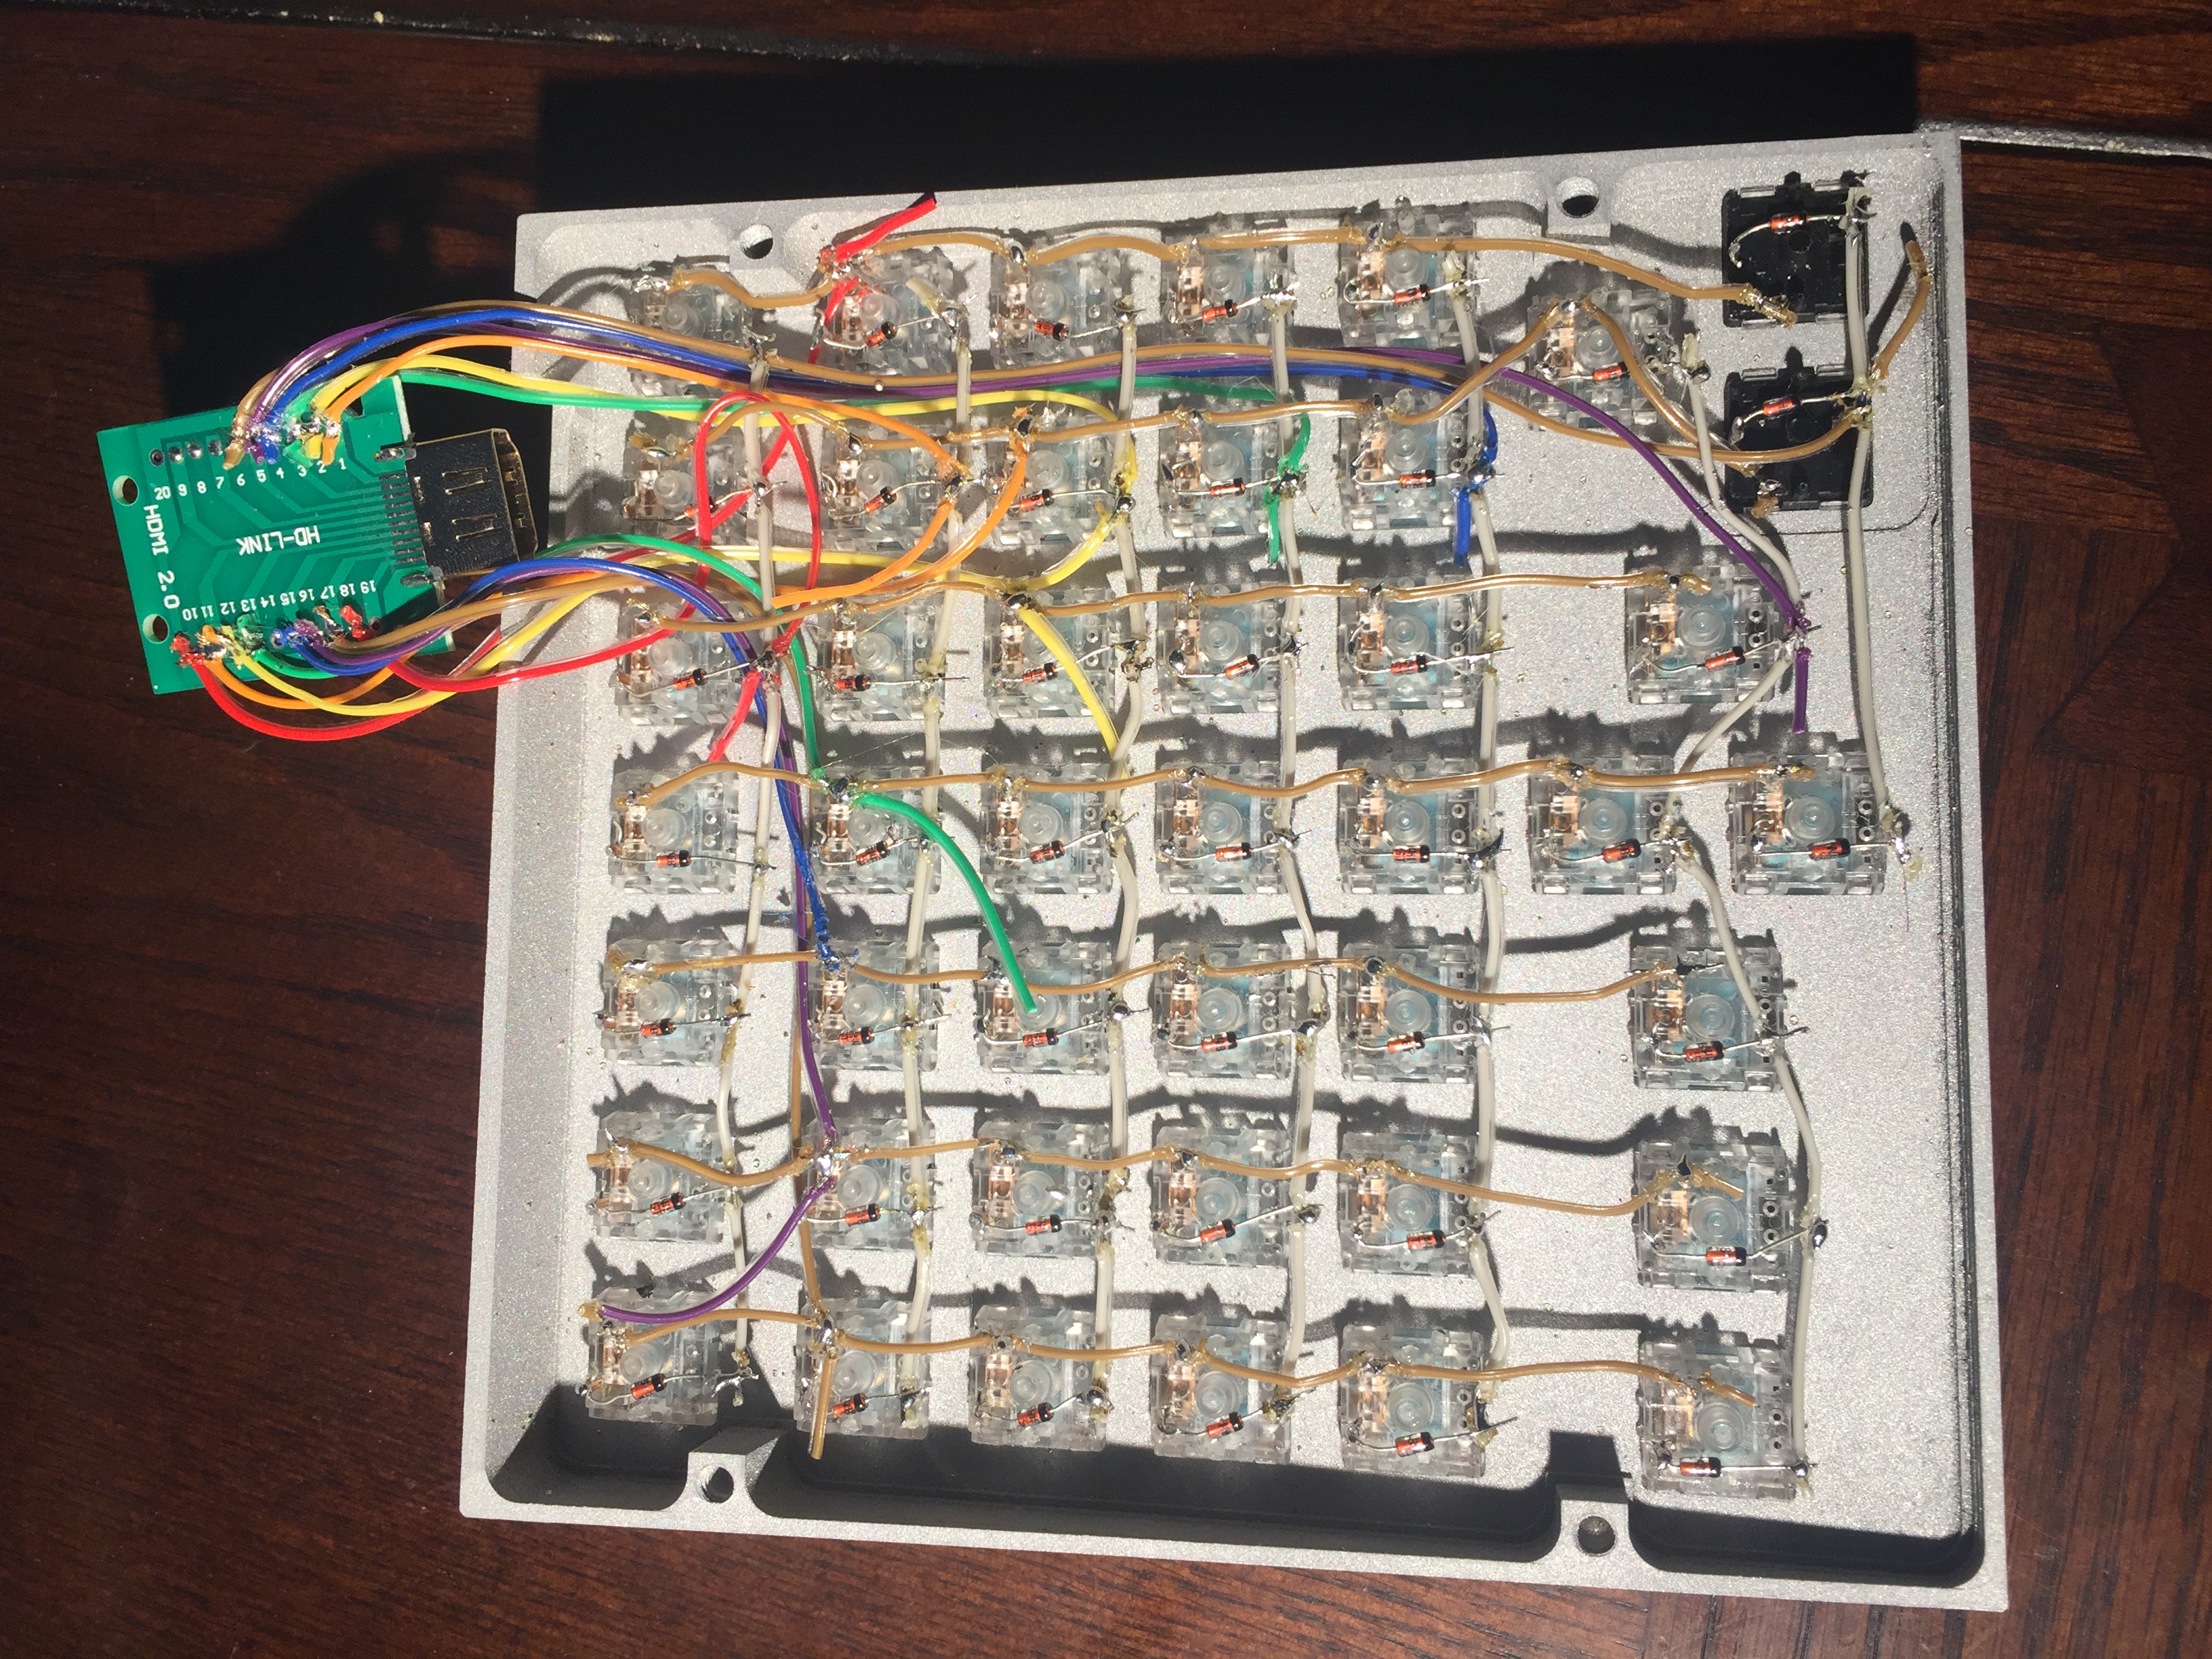
- 88 1N4148 diodes
- 1 WS2812B RGB LED strip (30 LEDs/meter)
- Enough electric wires/ribbon cables (28 AWG gauge but it is a pain to solder; <=24 AWG would be ideal)
- Electric tape
- 1 Teensy 2.0 micro-controller (24 pins)
- 1 six-foot micro-B to USB-A cable
- 2 HDMI breakout boards (19 pins each)
- 1 one-foot HDMI 4K cable (19 pins)
- Solder station and solder borrowed from Kevin (see Credits)
The building process took 6 days (24+ hours) as this is my first keyboard-build as well as my first big, constructive, and non-programming project in general. For the most part, I followed Matt3o's tutorial (thank you Matteo) for both wiring and firmware writing.
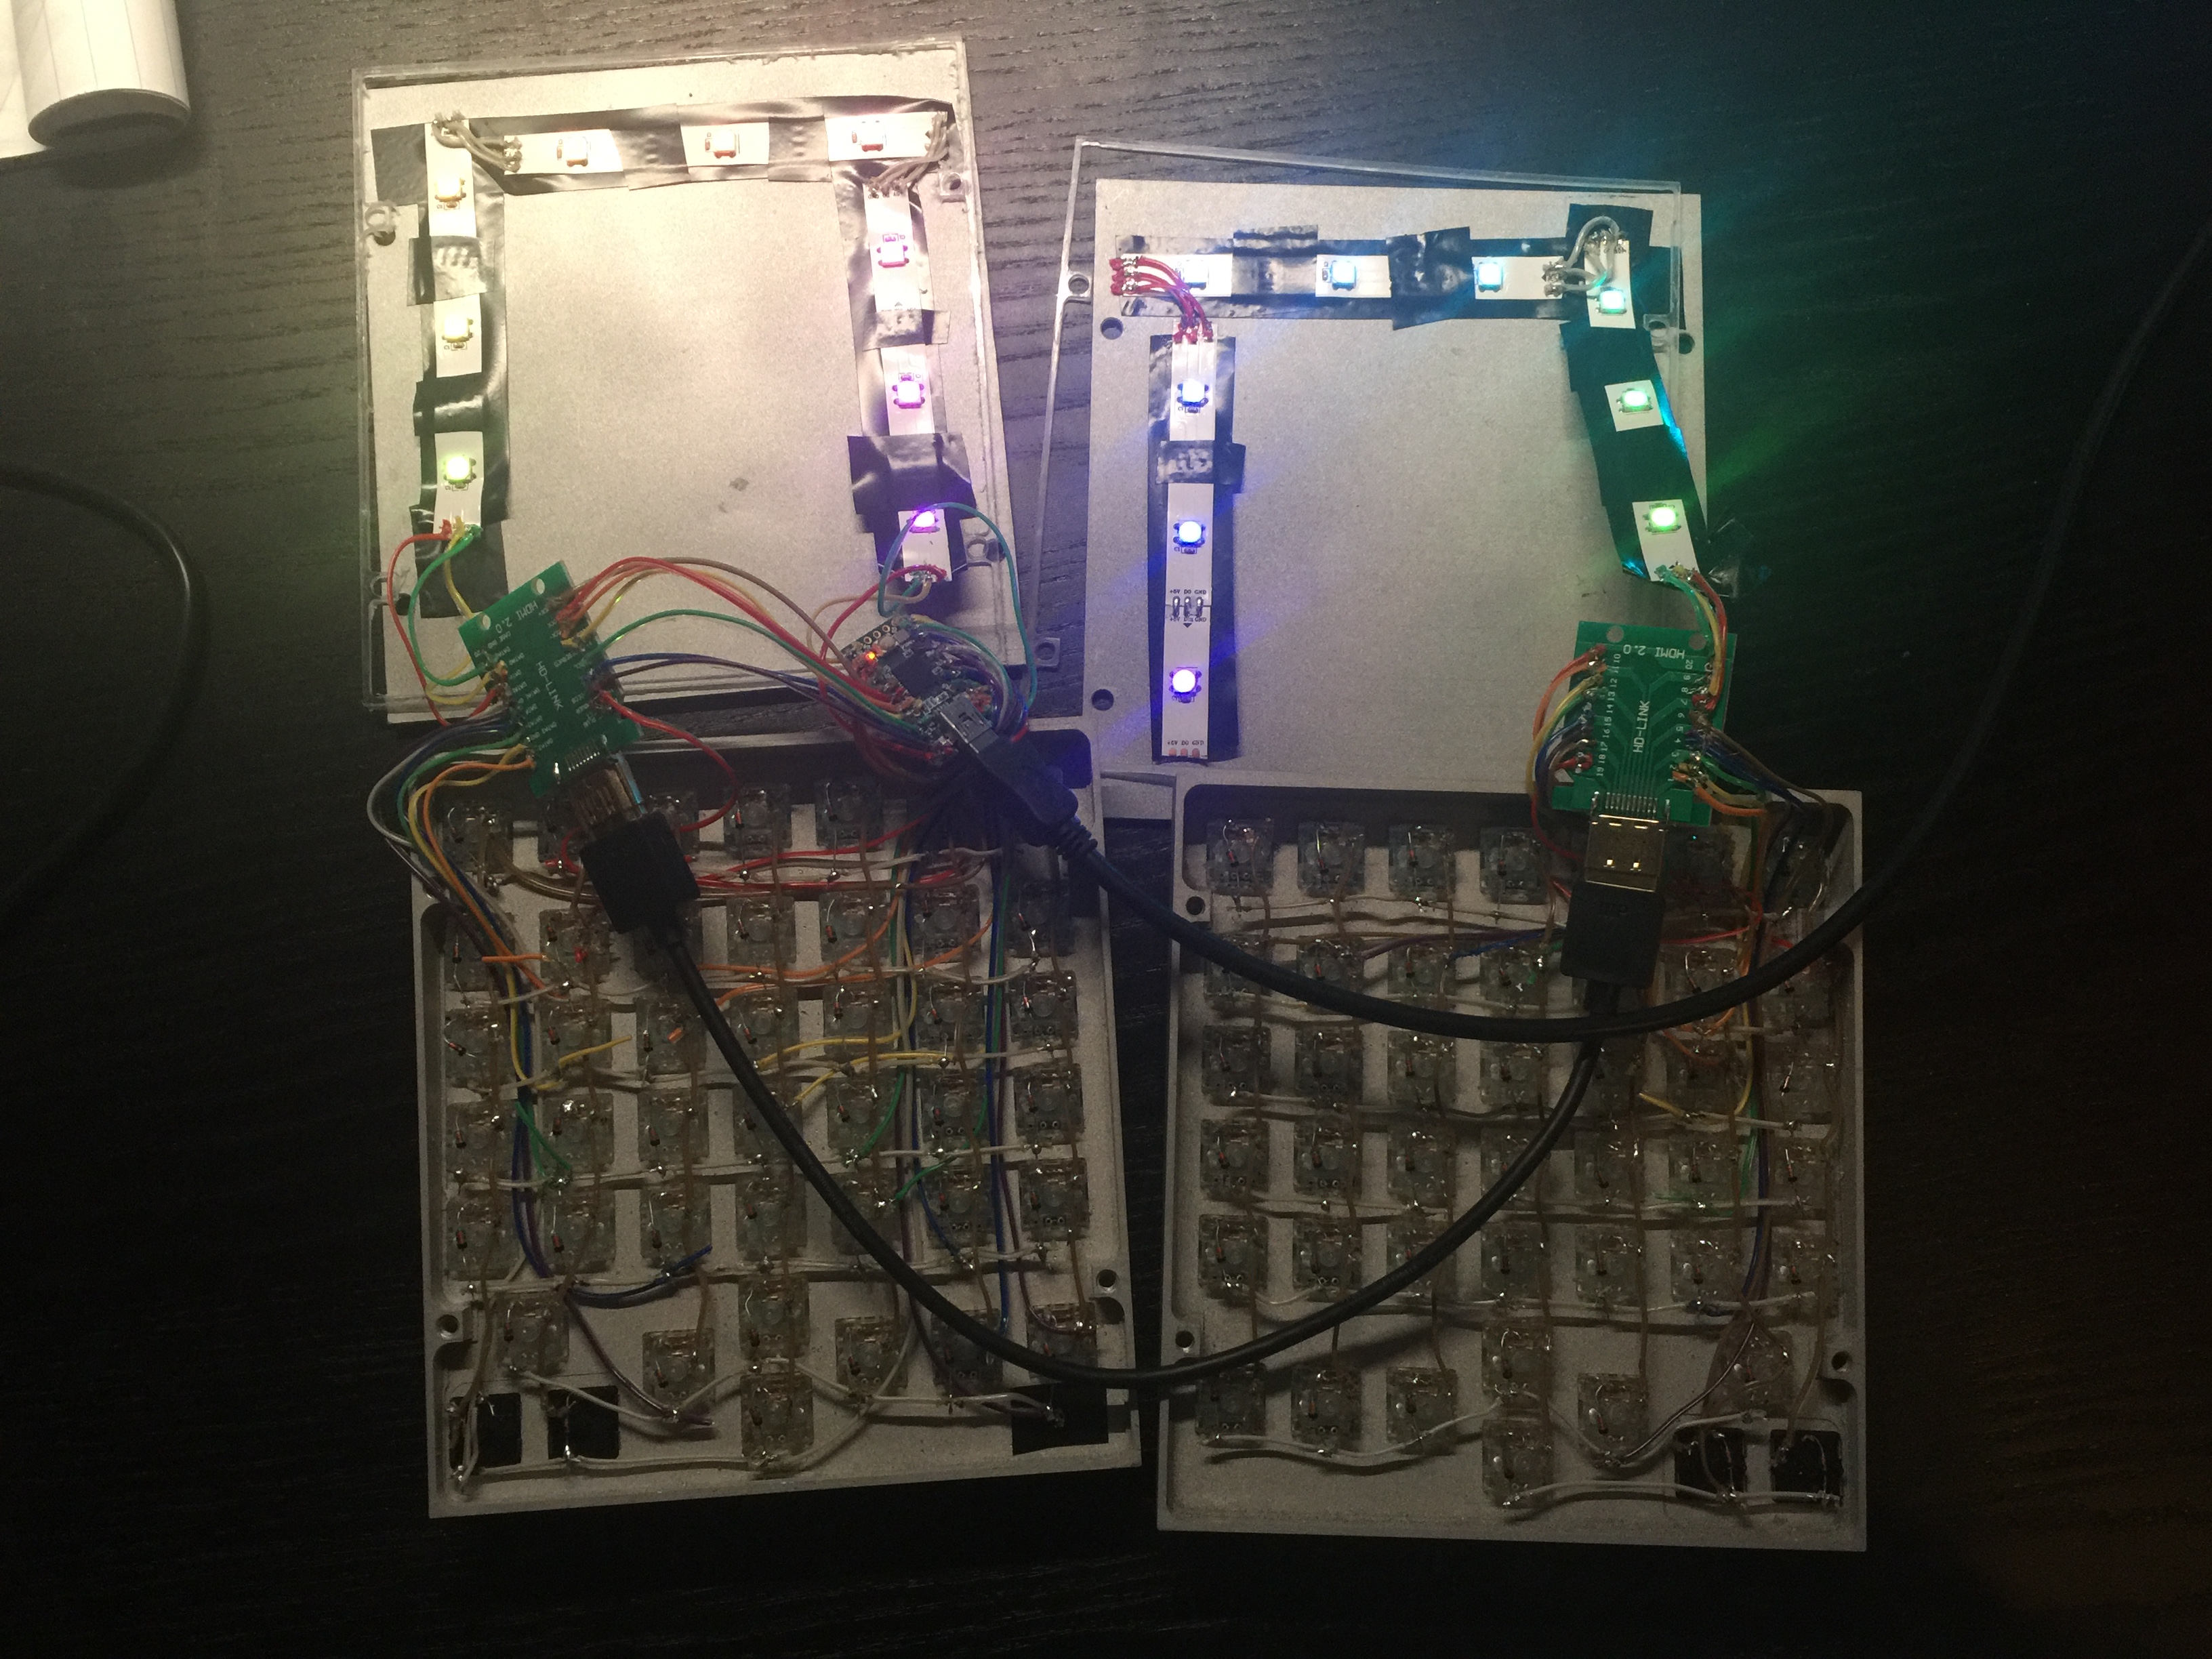
Now just as I'm writing this up I realized I should've taken more photos from the building process :/
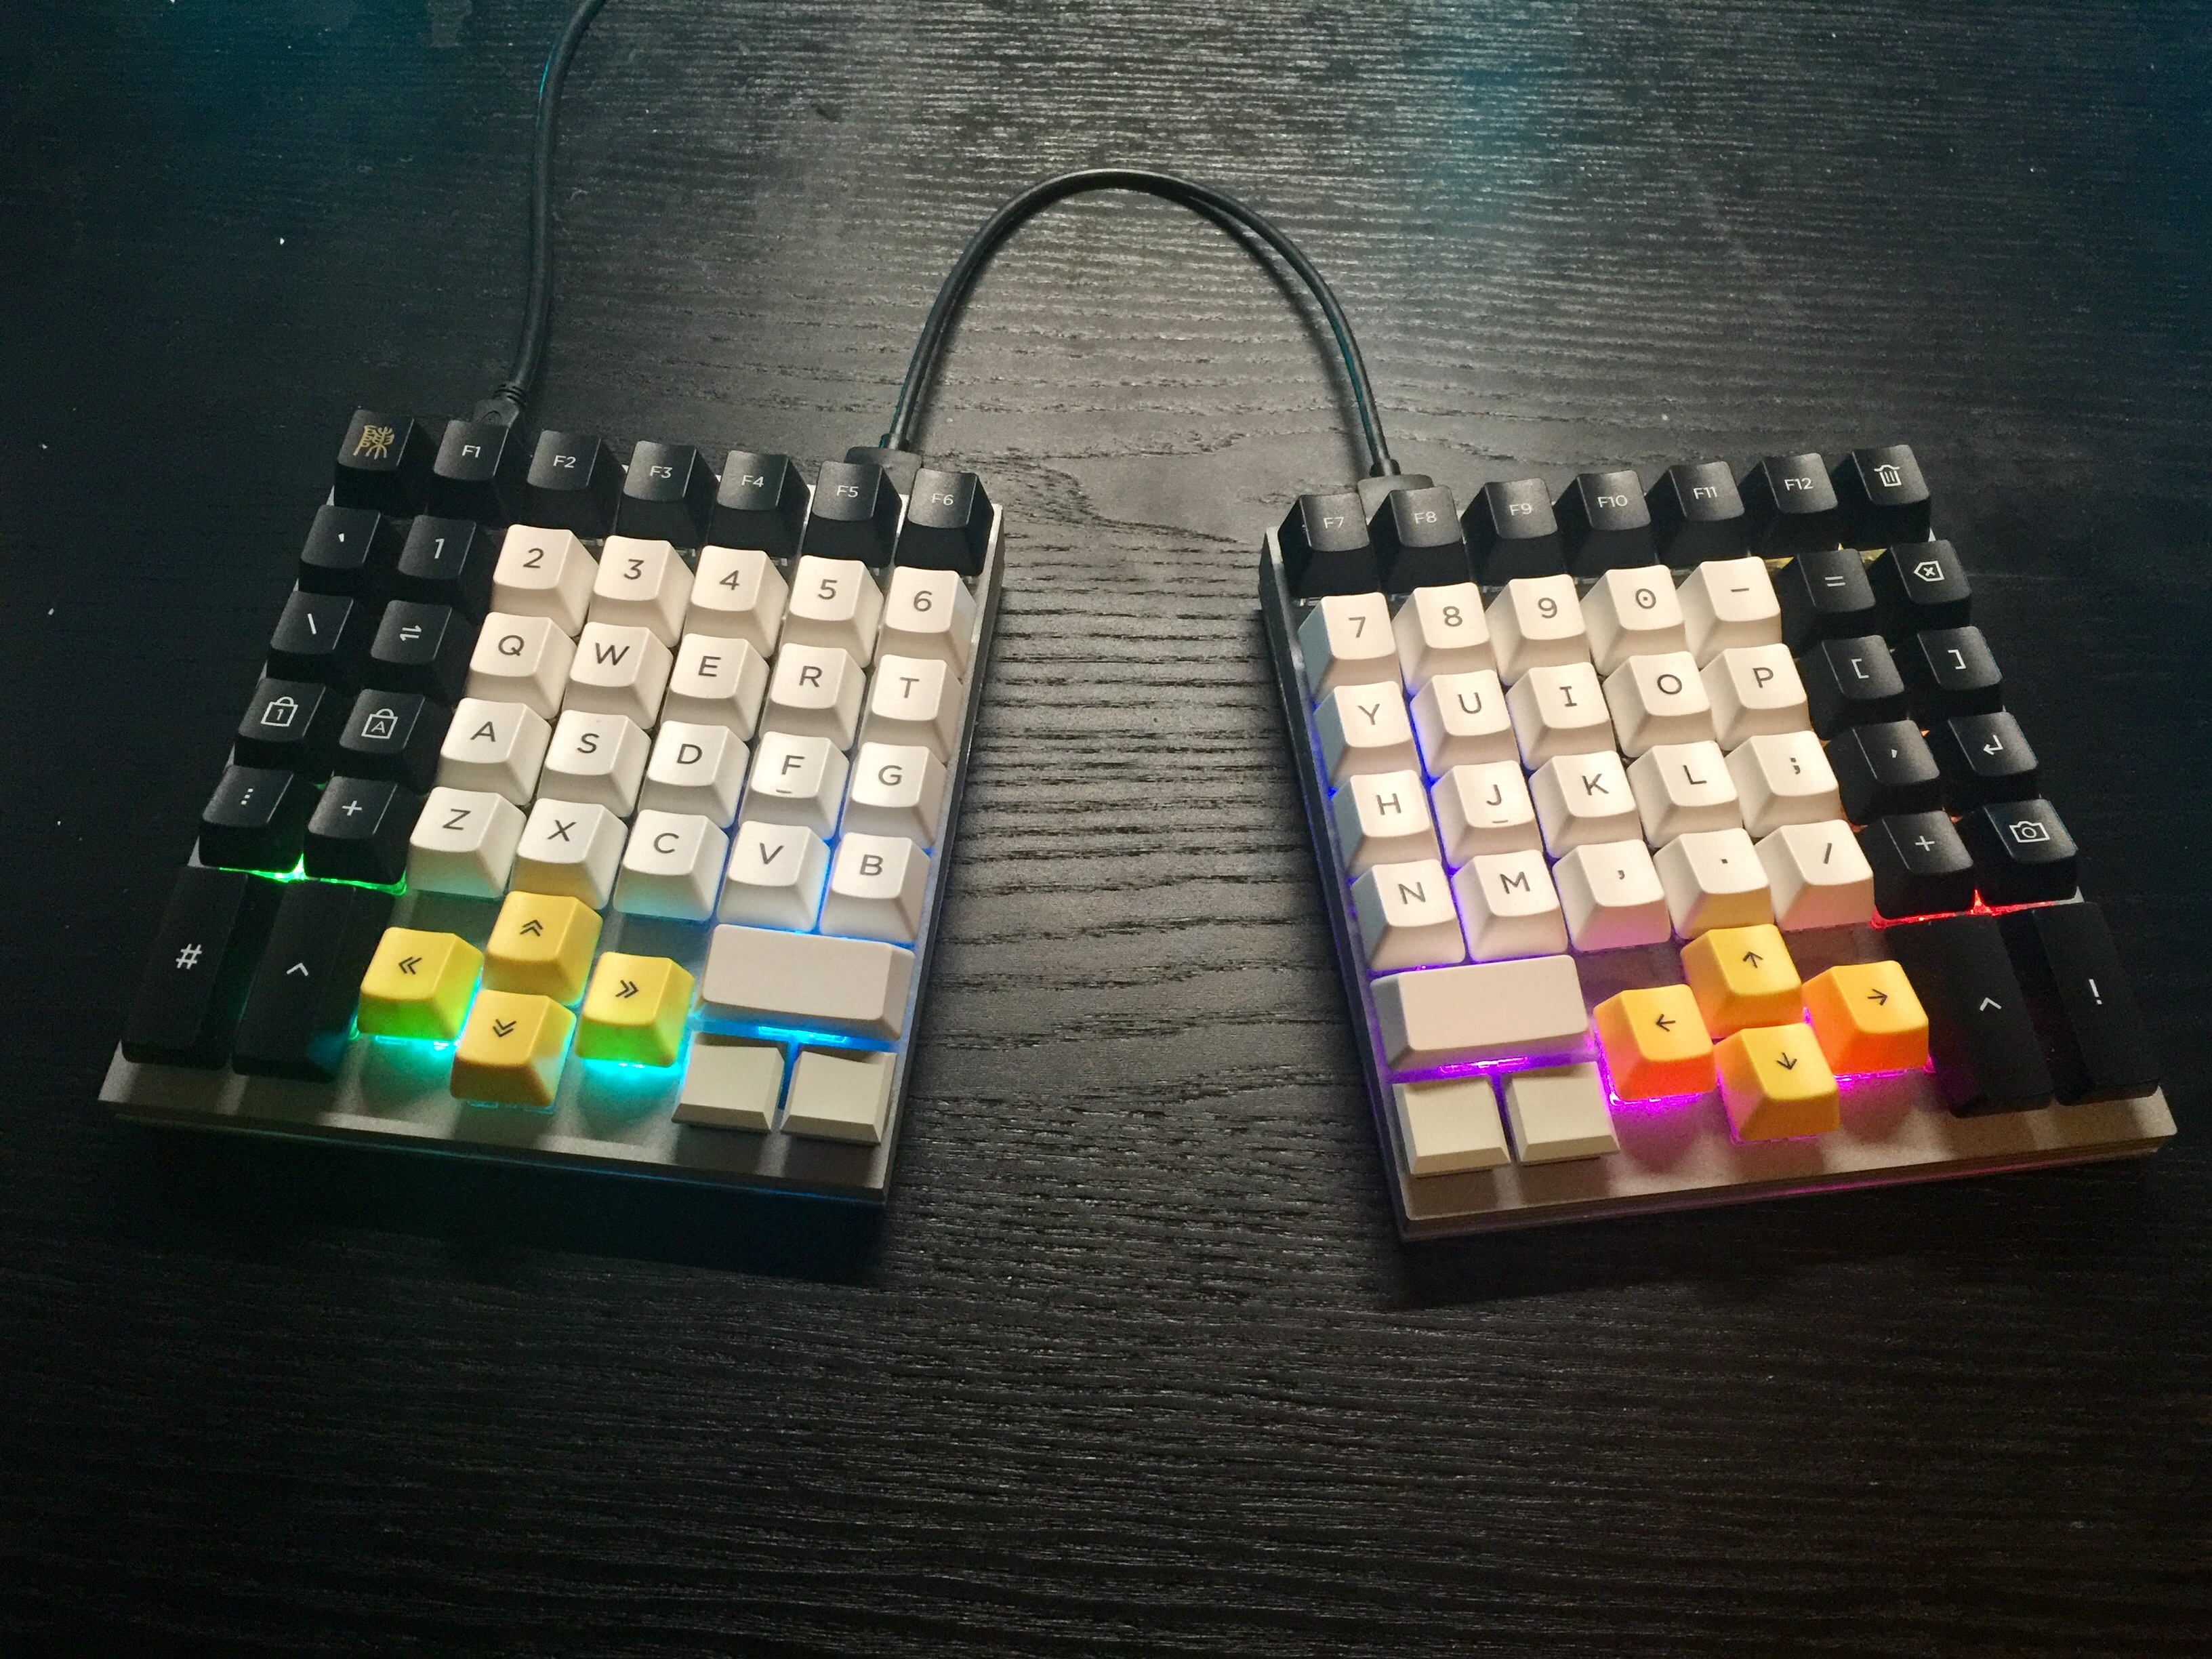
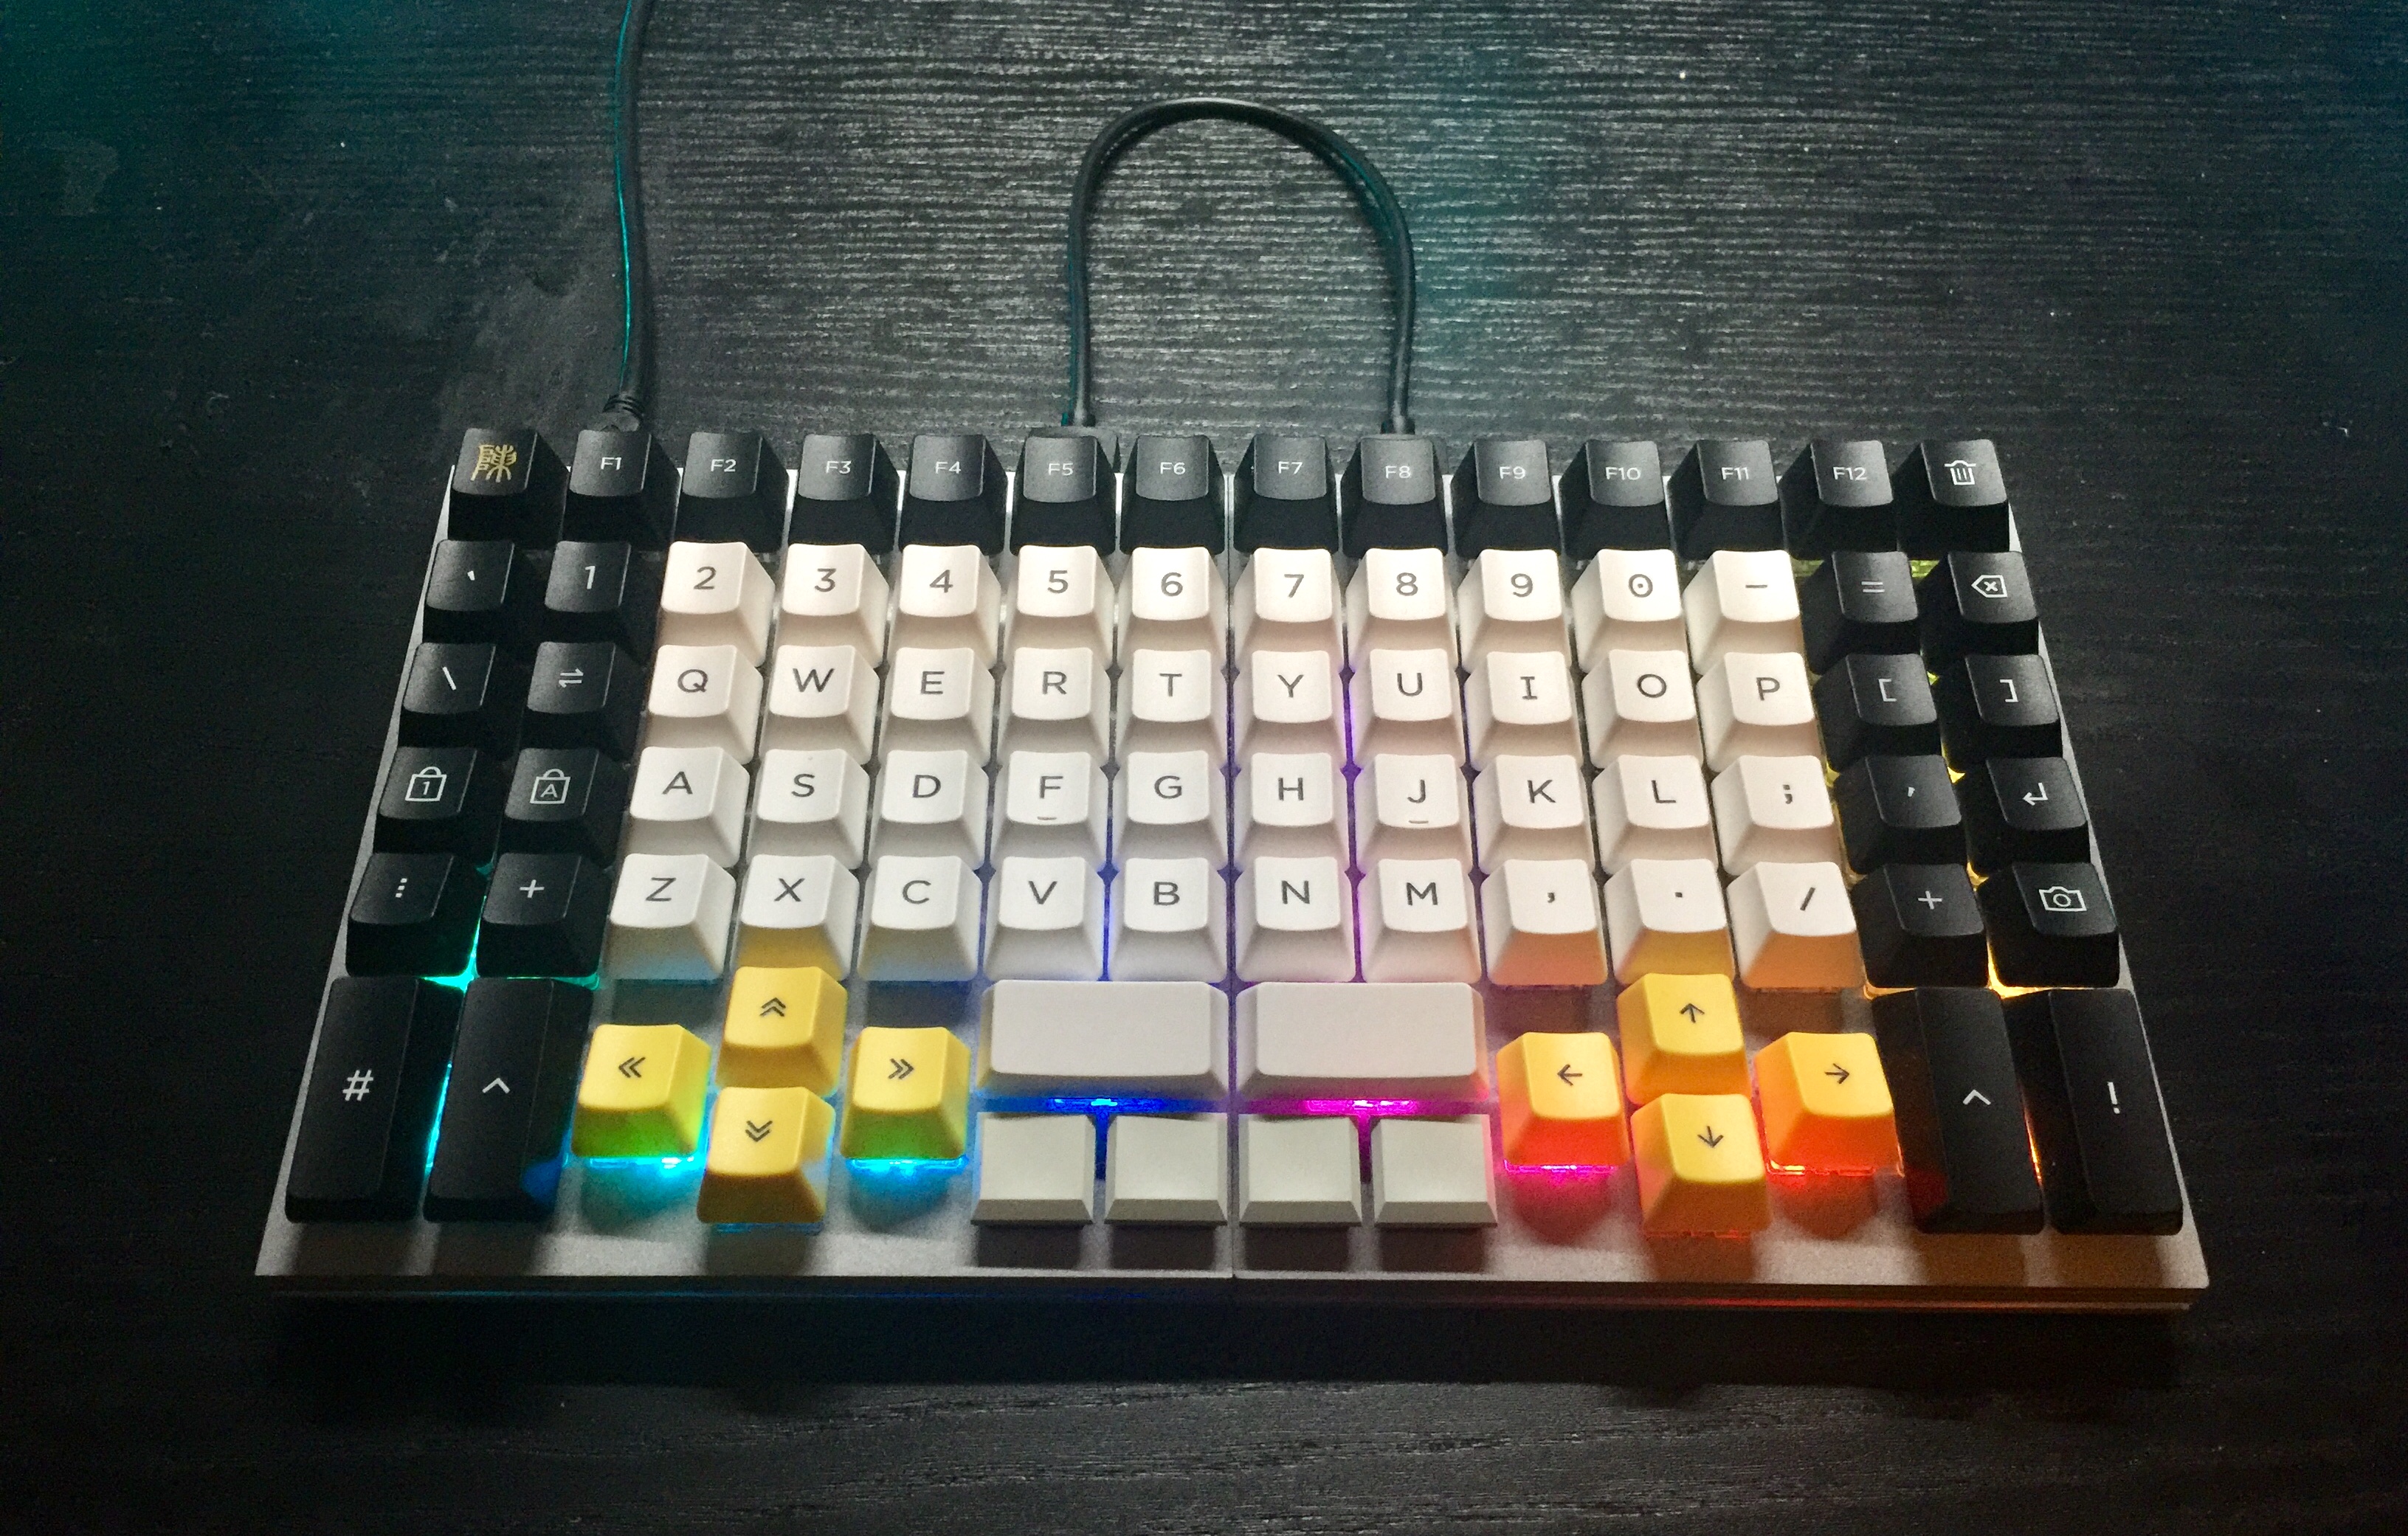
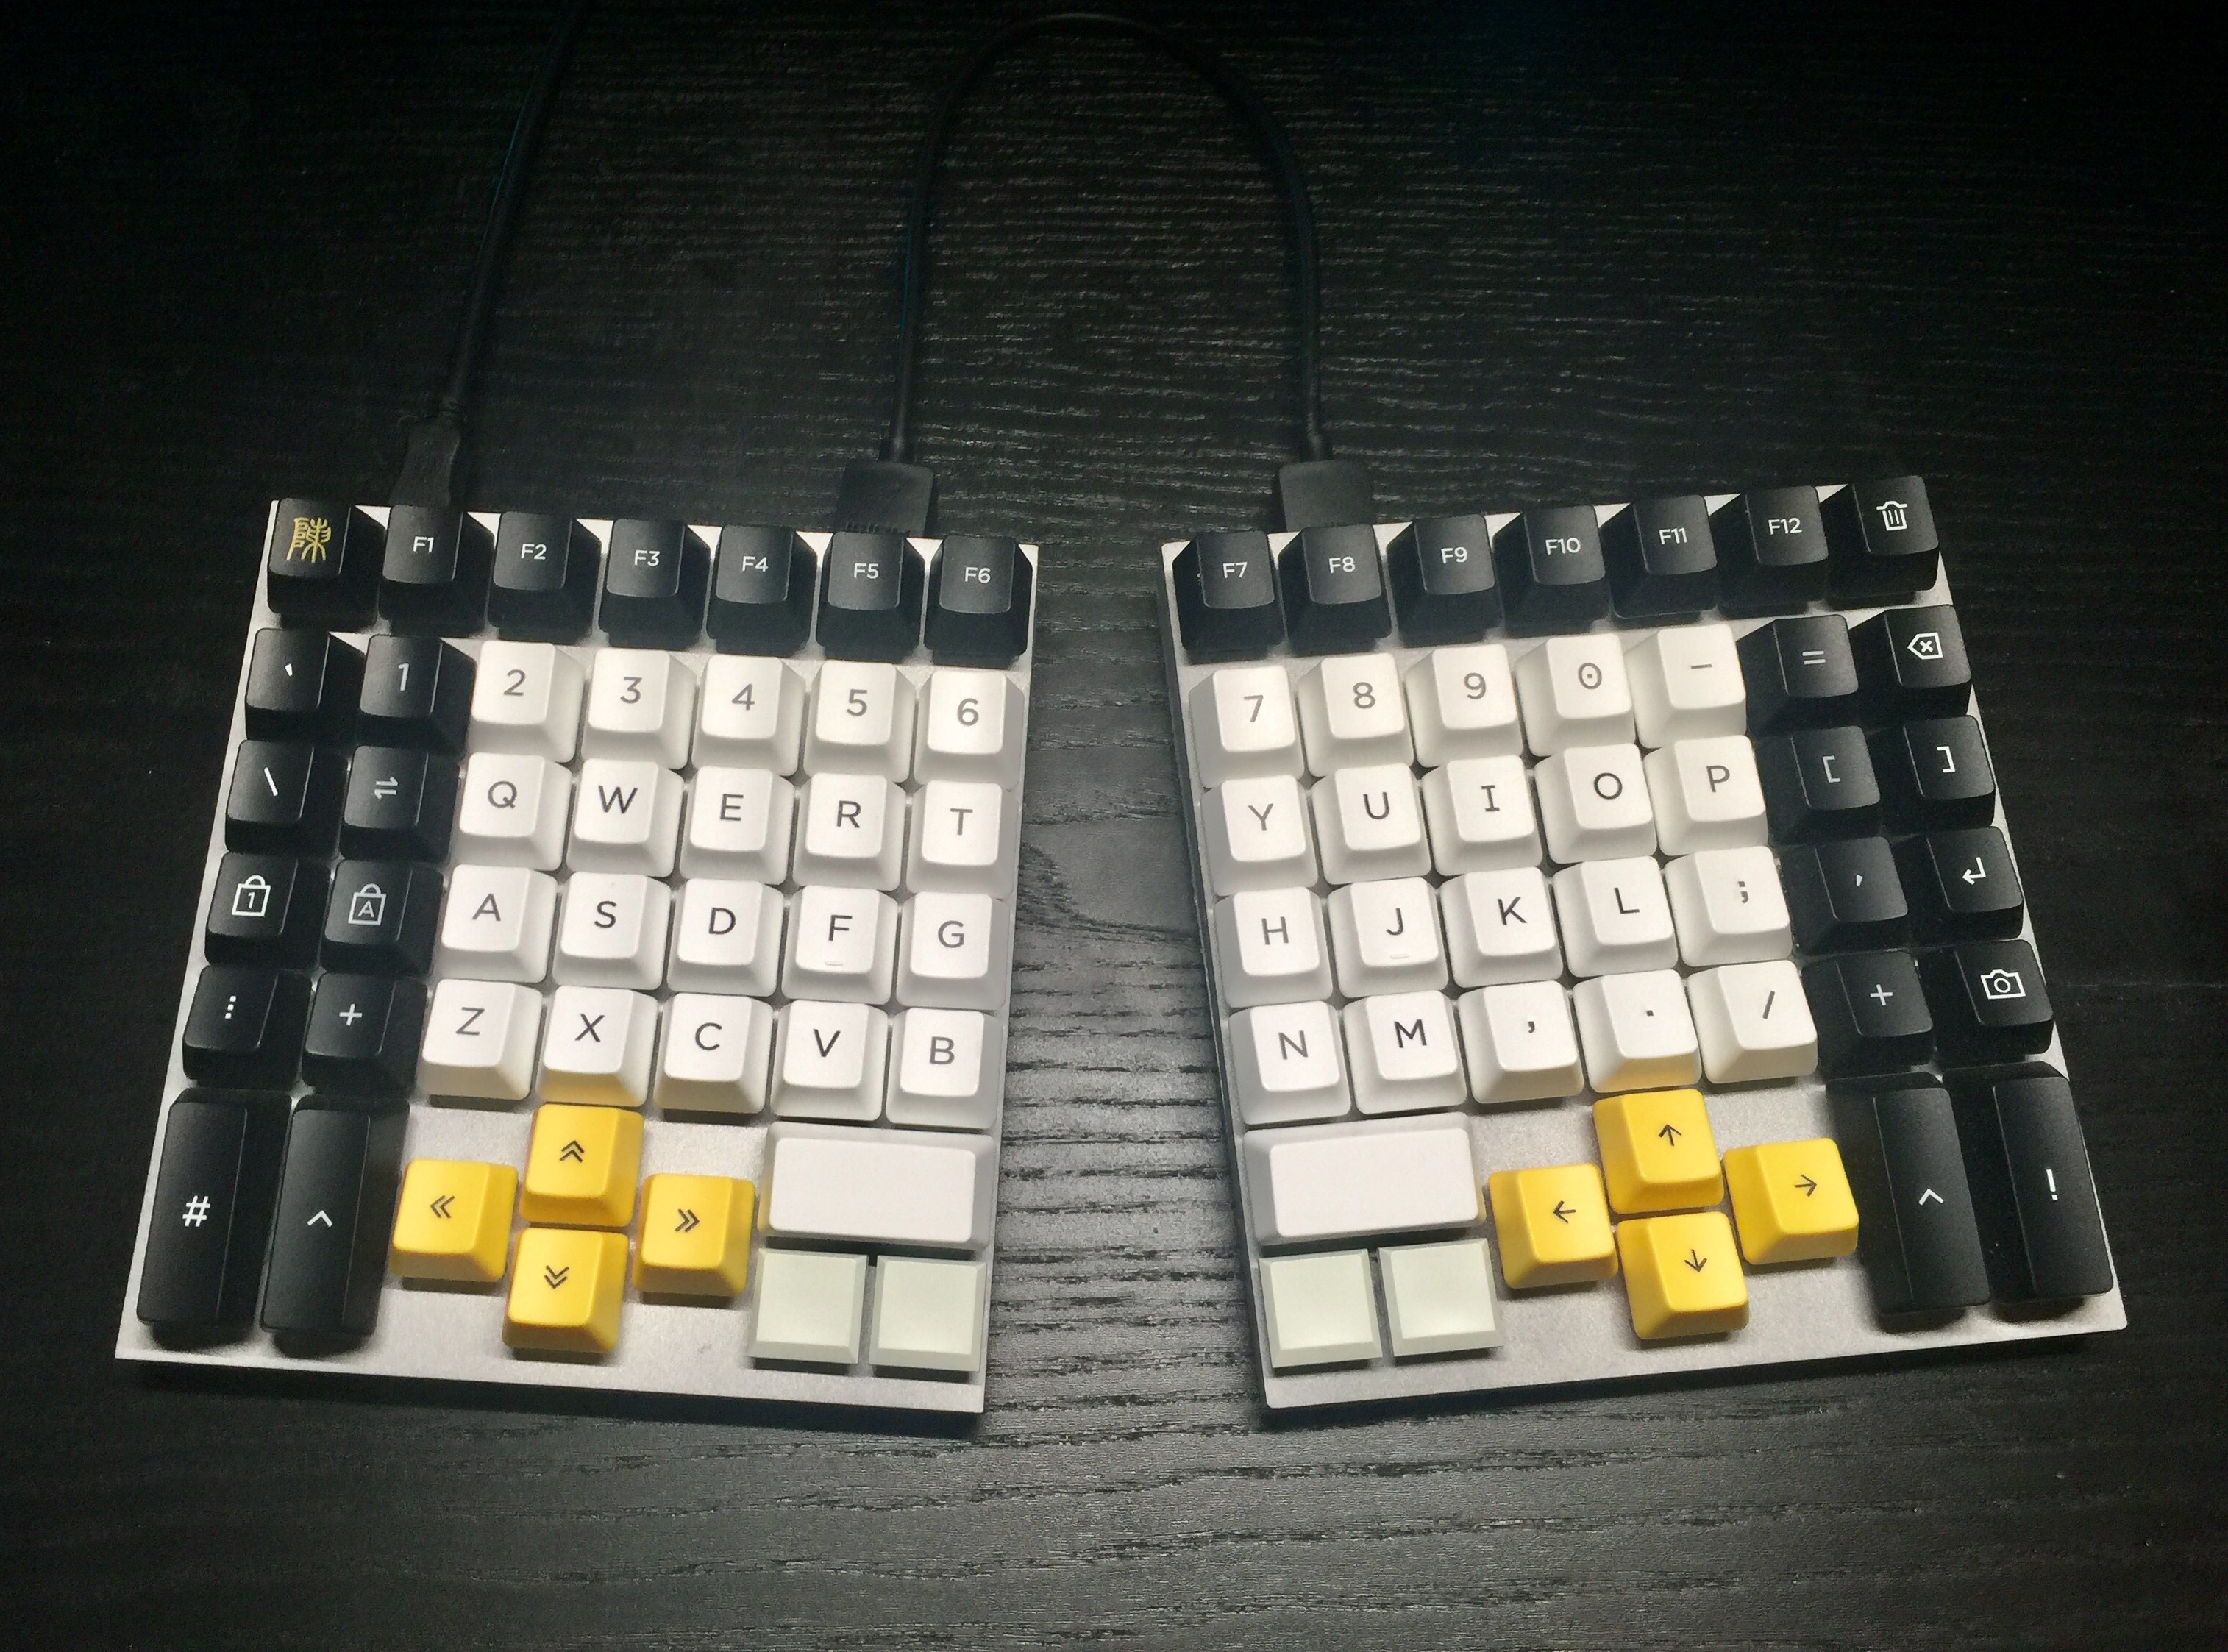
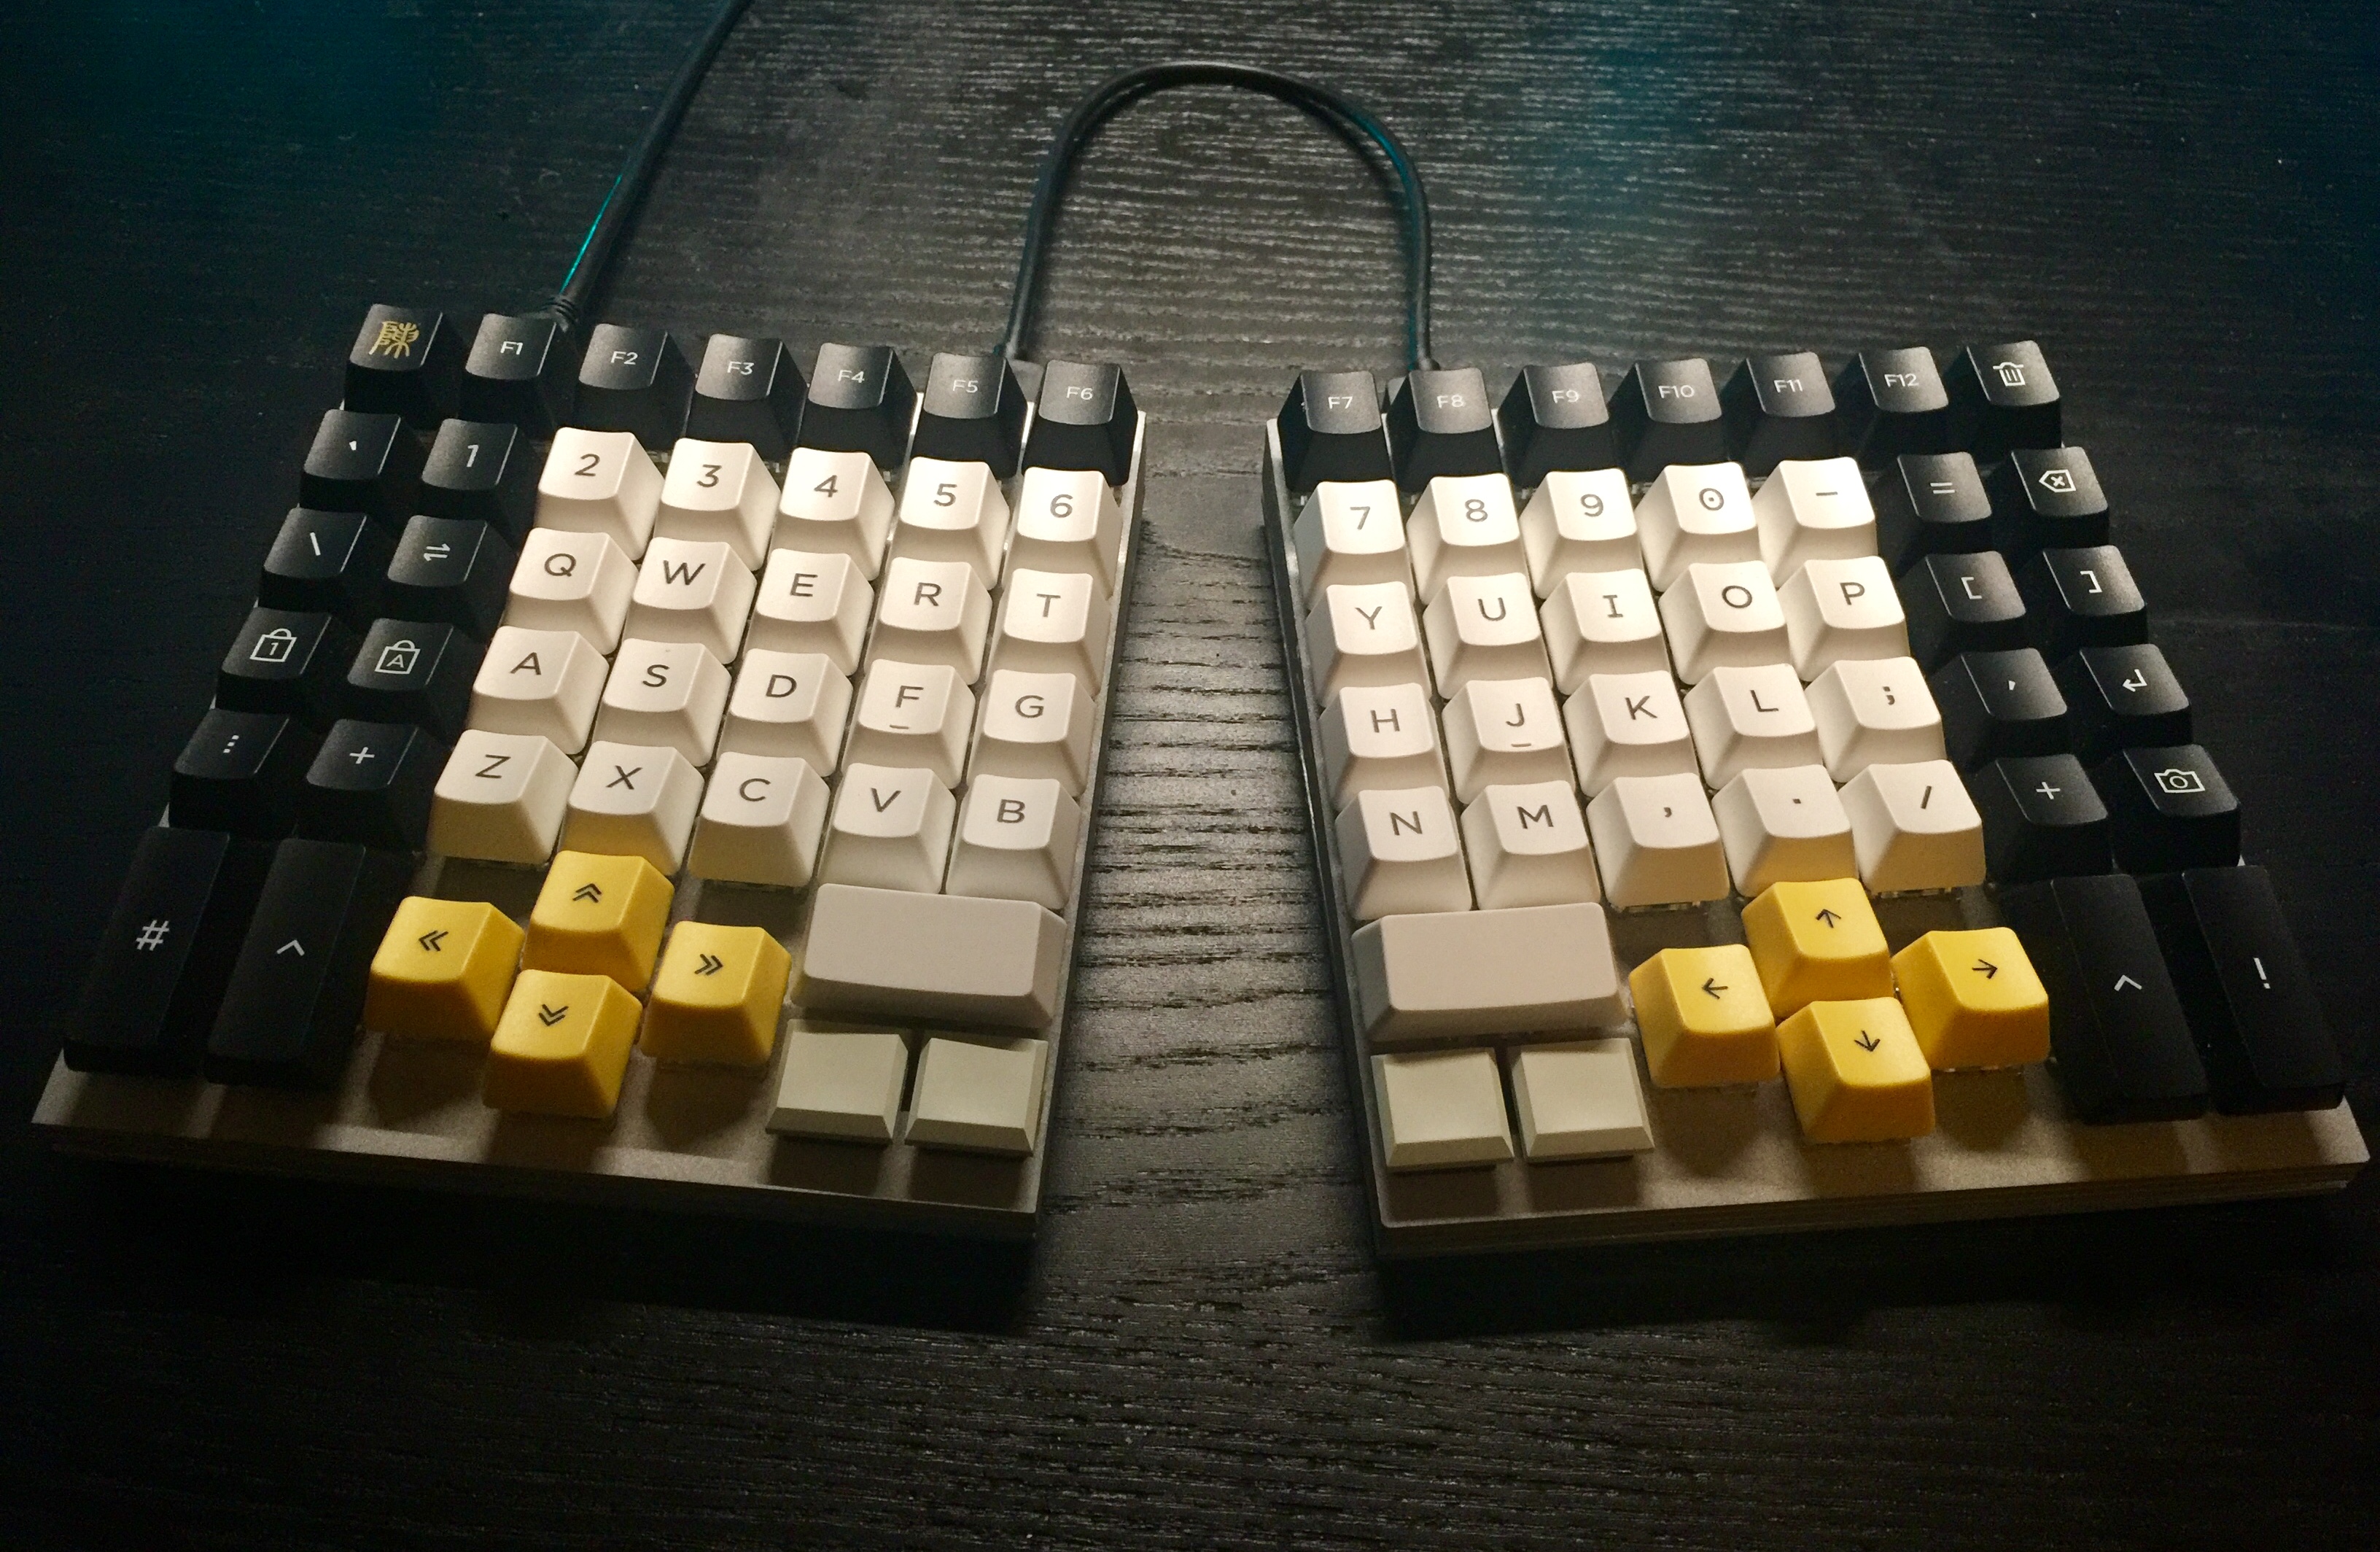
I designed the layout of this keyboard to better fit the principles of the Asianboii's UI (the keyboard layout I'm using), namely to increase and balance the usages of the strong fingers and to save the pinkies from doing laborious work. This design aims to make the palm-keys and thumb-keys more reachable and comfortable which will serve the purposes of a custom layout better. I chose to go with an ortholinear layout for (1) a pleasing "gridded" look, (2) an easier time finding keys on the number-row and function-row since the keys are all lined up, and (3) a hypothetically smoother transition between it and the traditional layout compared to a columnar-staggered layout.
This is the layout on how I think a normal person would use it:
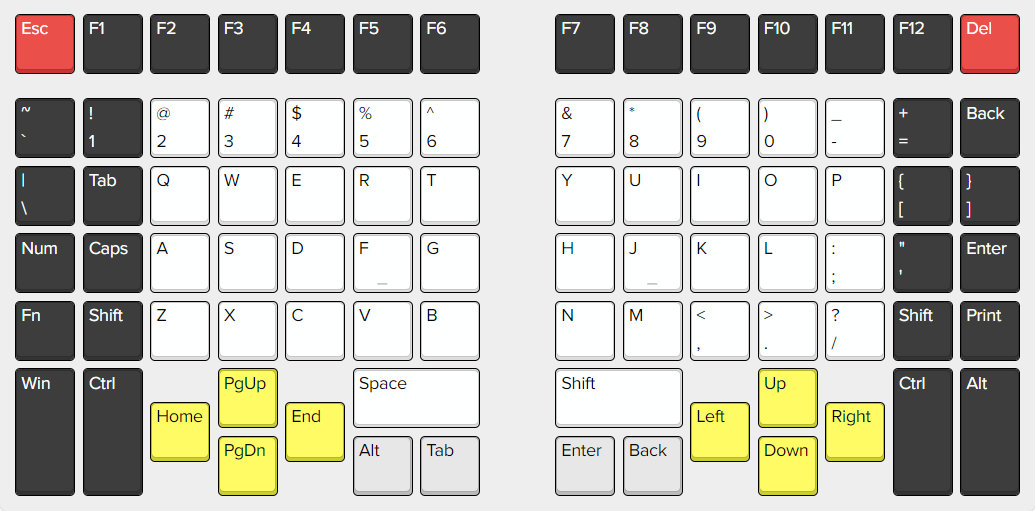
It's perfectly serviceable and has most of the advantages that those ergonomic keyboards out there have. It not only brings the most-used pinkie-keys (Tab, Shift, Enter, and Backspace) under the thumbs, but it also makes the Ctrl keys more naturally pressed by the palms. Its split feature also allows one to bring their mouse closer to the keyboard. However, as advertised, I don't use the Qwerty layout anymore, so here's the layout in my mind: (if you think it's confusing, just know that I'm weird)
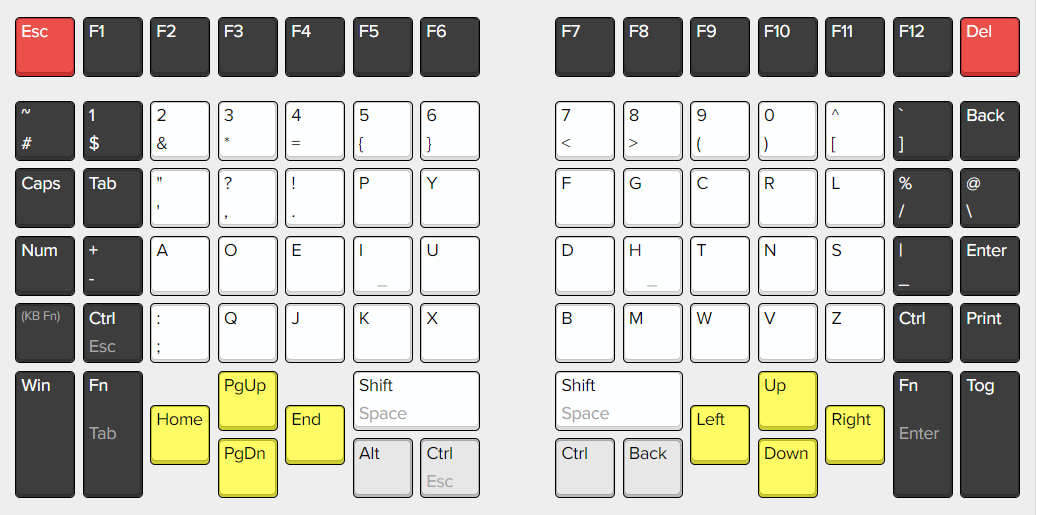
Check out this page for more information on why I invented my own funny layout.
I'll check back and add what I feel about this keyboard after a while. Can't wait to see how this keyboard will contribute to my next semester.
Huge shout out to Derrick from ACP Precision for helping me with the design and making the cases for this keyboard. I could not have dreamt of this project without him.
- Derrick on 100kGarages: https://100kgarages.com/profile.php?id=14510
- Derrick's email: [email protected]
- Derrick's Discord username: ACP PRECISION LLC#3310
Big thank you to my homie Kevin for his help, awesome battle-station to give birth to this project, and equally avid passion toward keyboards. Definitely go bother him!
- Kevin on YouTube: https://www.youtube.com/user/KevinSong1995
- Kevin on GitHub: https://github.com/Bettsongy
- Kevin's Discord username: Kev#1097
Gratitude to everyone who has contributed to this wonderful keyboard community, especially to those like Matt3o who had written very helpful tutorials that help beginners like me.
Qianlang